pentair mastertemp 400 troubleshooting manual

Welcome to the Pentair MasterTemp 400 troubleshooting manual‚ a comprehensive guide designed to help users diagnose and resolve issues with their pool heater efficiently. This manual provides detailed troubleshooting procedures‚ error code explanations‚ and maintenance tips to ensure optimal performance and longevity of the system. Whether you’re a homeowner or a technician‚ this resource offers a systematic approach to identifying and addressing common problems‚ empowering you to maintain your pool heater with confidence.

1.1 Overview of the Pentair MasterTemp 400 Pool Heater

The Pentair MasterTemp 400 is a high-efficiency pool heater designed for reliable performance and durability. Featuring a multifunction temperature controller‚ it offers precise temperature management and easy operation. With a digital display‚ it ensures intuitive control for pool and spa heating. Built with high-quality components‚ this heater is known for its safety features and energy efficiency‚ making it a top choice for pool owners.

1.2 Importance of Troubleshooting and Maintenance

Regular troubleshooting and maintenance are crucial for ensuring the optimal performance and longevity of the Pentair MasterTemp 400 pool heater. Identifying and addressing issues promptly prevents minor problems from escalating into costly repairs. Proper upkeep also enhances safety‚ efficiency‚ and reliability‚ guaranteeing consistent heating performance and extending the lifespan of the unit. Consistent care ensures your pool remains comfortable and functional year-round.

1.3 Purpose of the Manual

The Pentair MasterTemp 400 troubleshooting manual serves as a detailed resource for diagnosing and resolving pool heater issues. It provides step-by-step guidance‚ error code interpretations‚ and maintenance tips to empower users and technicians. The manual aims to enhance efficiency‚ safety‚ and system longevity‚ ensuring your pool heater operates optimally and reliably for years to come.

Structure of the Troubleshooting Manual

This manual is organized into clear sections‚ guiding users through troubleshooting‚ maintenance‚ and error resolution. Its logical flow ensures easy navigation‚ helping you quickly identify and address issues effectively.

2.1 Table of Contents

The table of contents provides a detailed outline of the manual‚ listing all major sections and subsections. It includes chapters on troubleshooting‚ error codes‚ maintenance‚ and safety precautions‚ allowing users to quickly locate specific information. The clear structure ensures easy navigation‚ making it simple to find solutions to common issues with the Pentair MasterTemp 400 pool heater.

2.2 Key Sections and Chapters

The manual is divided into key sections‚ including error code interpretation‚ troubleshooting guides‚ and maintenance tips. Chapters cover heater operation‚ diagnostic tools‚ and safety protocols. Additional sections focus on parts replacement and control panel functions‚ ensuring comprehensive coverage of all aspects of the Pentair MasterTemp 400 pool heater for effective problem-solving and system upkeep.

2.3 How to Use the Manual Effectively

To maximize the benefits of this manual‚ start by reviewing the table of contents to locate relevant sections quickly. Use the error code guide to identify issues and follow the step-by-step troubleshooting flowcharts. Refer to the maintenance tips and parts diagrams for repairs. Familiarize yourself with safety precautions and control panel functions to ensure safe and efficient operation of your Pentair MasterTemp 400 pool heater.

Common Error Codes and Their Meanings

The Pentair MasterTemp 400 displays specific error codes like E01‚ E02‚ and E03 to indicate issues such as ignition failure‚ temperature sensor problems‚ or gas supply errors‚ aiding quick diagnosis and resolution.

3.1 List of Common Error Codes

The Pentair MasterTemp 400 troubleshooting manual identifies common error codes such as E01‚ E02‚ and E03‚ which indicate issues like ignition failure‚ temperature sensor malfunctions‚ or gas supply problems. Additional codes like E04 and E05 may signal pressure sensor errors or communication faults. These codes provide a starting point for diagnosing and resolving specific heater malfunctions‚ ensuring efficient troubleshooting.

3.2 How to Interpret Error Codes

To interpret error codes on the Pentair MasterTemp 400‚ locate the code displayed on the control panel. Refer to the manual for code definitions‚ such as E01 for ignition issues or E02 for temperature sensor problems. Each code corresponds to specific malfunctions‚ guiding you to the root cause. Understanding these codes allows for targeted troubleshooting and efficient resolution of heater issues.

3.3 Step-by-Step Guide to Error Code Troubleshooting

Start by identifying the error code displayed on the control panel. Refer to the manual to understand the code’s meaning. Follow the recommended diagnostic steps‚ such as checking gas supply‚ ignition components‚ or sensor connections. Perform tests as instructed‚ and replace faulty parts if necessary. Document findings and repeat the process until the issue is resolved and the heater operates normally.

Troubleshooting Guide

This section provides a structured approach to identifying and resolving issues with the Pentair MasterTemp 400 pool heater‚ including error code analysis and diagnostic techniques for effective problem-solving.

4.1 Identifying the Problem

Identifying the problem is the first step in effective troubleshooting. Start by observing the heater’s behavior‚ checking for error codes on the control panel‚ and looking for signs of leaks‚ unusual noises‚ or ignition issues. Review the troubleshooting sections and maintenance history to pinpoint the root cause of the issue. This systematic approach ensures accurate diagnosis and efficient resolution. Always refer to the manual for specific guidance.

4.2 Diagnostic Tools and Techniques

Essential diagnostic tools include a multimeter‚ pressure gauge‚ and error code reader. Techniques involve checking electrical connections‚ inspecting gas lines‚ and verifying water flow. Analyze error codes displayed on the control panel to identify specific issues; Use the manual’s troubleshooting flowchart for systematic diagnosis. Regular visual inspections and performance tests help detect potential problems early‚ ensuring efficient and safe operation of the heater.

4.3 Flowchart for Systematic Troubleshooting

The flowchart provides a structured approach to troubleshooting‚ starting with error code identification and progressing through observation‚ testing‚ and resolution steps. It guides users from initial problem recognition to final repair‚ ensuring a logical and efficient process. Novice users and professionals alike can follow the visual guide to systematically address issues‚ minimizing downtime and ensuring safe‚ effective solutions tailored to the MasterTemp 400 system.

Common Issues and Solutions

This section outlines frequent problems with the MasterTemp 400‚ such as leaks‚ ignition failure‚ and heating element malfunctions‚ along with practical solutions and repair guidance for each issue.

5.1 Leaks and Cracks in the Manifold

Leakage or cracks in the manifold are common issues requiring immediate attention. Inspect for visible cracks or water seeping from joints. Replace the manifold if damage is found‚ following the manual’s instructions. Regular maintenance‚ including tightening connections and inspecting for wear‚ can prevent such problems. Addressing these issues promptly ensures optimal heater performance and prevents further damage.

5;2 Ignition Issues and Failure to Heat

Ignition problems and failure to heat are common issues with the Pentair MasterTemp 400. Check for error codes related to ignition failure. Ensure the gas supply is adequate and connections are secure. Clean or replace the igniter or flame sensor if faulty. Verify proper venting and airflow. Consult the manual for specific troubleshooting steps or contact a certified technician if issues persist.

5.3 Heating Element Malfunction

A malfunctioning heating element can prevent the Pentair MasterTemp 400 from generating heat; Check for error codes indicating element failure. Inspect the element for mineral buildup or damage. Ensure proper electrical connections and voltage supply. Clean or replace the heating element if corroded or faulty. If issues persist‚ refer to the manual or contact a certified technician for professional assistance to restore functionality.

Safety Precautions and Warnings

Always follow safety guidelines when operating the Pentair MasterTemp 400. Ensure proper installation‚ handle gas leaks carefully‚ and adhere to all warnings to prevent accidents and ensure safe operation.

6.1 General Safety Guidelines

Always follow safety guidelines when working with the Pentair MasterTemp 400. Handle gas leaks immediately‚ ensure proper ventilation‚ and only allow qualified personnel to perform installations or repairs. Adhere to all warnings and instructions provided in the manual to prevent accidents and ensure safe operation of the pool heater.

6.2 Warnings for Installers and Users

Always follow the instructions in the manual to avoid hazards. Installers must be qualified and adhere to gas supplier guidelines. Users should never attempt repairs without proper training. Be aware of potential gas leaks and high temperatures. In case of a gas leak‚ contact the supplier or fire department immediately to ensure safety and prevent accidents.

6.3 Emergency Procedures

In case of a gas leak‚ immediately turn off the heater and gas supply. Evacuate the area and do not restart the appliance. Contact your gas supplier or local fire department for assistance. If the heater malfunctions‚ disconnect power and refer to the troubleshooting guide. Always prioritize safety to prevent accidents and ensure proper repair by authorized personnel only.

Maintenance and Preventative Care

Regular cleaning‚ inspection‚ and servicing are essential to ensure optimal performance. Clean filters‚ check for wear‚ and address leaks promptly. Schedule annual professional servicing to maintain efficiency and safety.

7.1 Routine Maintenance Tasks

Perform regular maintenance tasks such as cleaning filters‚ inspecting gas lines‚ and checking electrical connections. Ensure proper ventilation and verify that all safety devices are functioning correctly. Schedule annual professional inspections to maintain efficiency and prevent potential issues. Consistent upkeep will extend the lifespan of your Pentair MasterTemp 400 pool heater.

7.2 Cleaning and Inspection Procedures

Regularly clean the burner‚ heat exchanger‚ and venturi to ensure proper airflow and combustion. Inspect for corrosion‚ mineral buildup‚ or blockages. Check electrical connections and controls for damage or wear. Clean the control panel and ensure all sensors are free of debris. Schedule professional inspections annually to maintain efficiency and safety‚ preventing potential issues before they arise.

7.3 Tips for Extending Heater Lifespan

Perform routine maintenance‚ including cleaning the heat exchanger and burner. Check for leaks and corrosion regularly. Ensure proper water circulation and balance chemical levels. Winterize the heater when not in use. Replace worn or damaged parts promptly. Schedule annual professional inspections to identify and address potential issues early‚ ensuring optimal performance and longevity of the system.

Parts Diagram and Replacement Instructions

This section provides a detailed parts diagram and step-by-step instructions for replacing components like the manifold‚ ensuring safe and effective repairs. Follow the guidelines carefully.

8.1 Understanding the Parts Diagram

The parts diagram is a visual representation of the MasterTemp 400 heater’s components. It identifies key sections such as the manifold‚ ignition system‚ and heating elements. Referencing this diagram helps locate parts needing replacement or maintenance‚ ensuring accurate repairs and minimizing downtime. Proper understanding of the diagram is essential for effective troubleshooting and safe servicing of the heater.

8.2 Replacing the Manifold

Replacing the manifold involves turning off the power and gas supply‚ then draining the system. Disconnect the plumbing and electrical connections carefully. Remove the old manifold and install the new one‚ ensuring proper alignment and sealing. Reconnect all components and test for leaks. Always follow the manual’s specific instructions for your MasterTemp 400 model to ensure a safe and successful replacement. Refer to the parts diagram for clarity.

8.3 Other Common Part Replacements

Beyond the manifold‚ common replacements include igniter electrodes‚ pressure switches‚ and control panels. Turn off power and gas before starting. Use the parts diagram to locate components and follow manual instructions for each replacement. Ensure all connections are secure and test functionality post-installation to maintain efficiency and safety. Regular replacements prevent major breakdowns and extend heater lifespan.

Control Panel Features and Functions

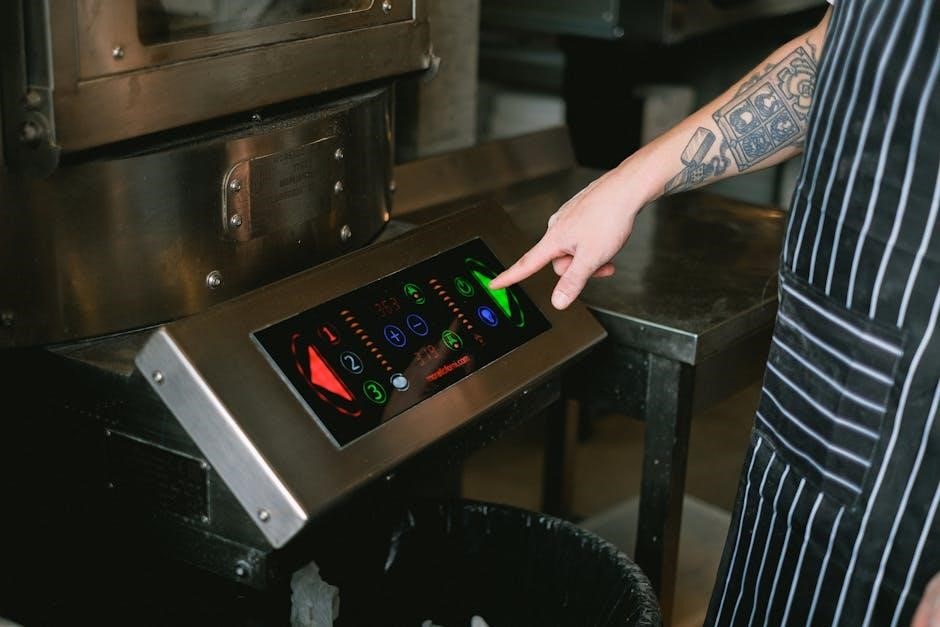
The control panel features a digital display‚ mode selection between pool and spa‚ temperature adjustment‚ and diagnostic capabilities. It provides real-time monitoring and user-friendly navigation for seamless operation.

9.1 Navigating the Control Panel

Navigating the Pentair MasterTemp 400 control panel is straightforward. Use the mode button to switch between pool and spa settings. Adjust temperature with up/down arrows. The digital display shows current settings‚ error codes‚ and system status. Pressing select confirms changes. Refer to the manual for detailed navigation instructions and button functions to ensure smooth operation and troubleshooting. Regular use enhances familiarity with its intuitive interface.

9.2 Adjusting Settings and Configurations

Adjusting settings on the Pentair MasterTemp 400 requires accessing the control panel. Use the temperature adjustment buttons to set desired heat levels. The mode button switches between pool and spa operation. Configuration options‚ like high/low heat settings and timer functions‚ can be modified via the menu. Always refer to the manual for precise instructions to avoid errors and ensure optimal performance. Proper configuration enhances efficiency and safety.

9.3 Resetting the Control Panel

To reset the Pentair MasterTemp 400 control panel‚ press and hold the mode button for 5 seconds until the display resets. This action restores factory settings and clears any error codes. Ensure power is cycled off and on after resetting to ensure proper functionality. This process helps resolve software glitches without affecting configuration settings‚ ensuring smooth operation of the pool heater system.

Downloading and Accessing the Manual

Access the Pentair MasterTemp 400 manual online by visiting the official Pentair website. Download the PDF version for easy reference and navigate the digital manual effortlessly.

10.1 Where to Find the Manual Online

The Pentair MasterTemp 400 troubleshooting manual is available on the official Pentair website. Visit the support section and search for the model-specific resources to locate the manual. Additionally‚ authorized distributors and pool supply websites may offer the manual for free download in PDF format‚ ensuring easy access for users seeking troubleshooting guidance.

10.2 How to Download the PDF Version

To download the Pentair MasterTemp 400 troubleshooting manual in PDF format‚ visit the official Pentair website or authorized distributor sites. Navigate to the support or resources section‚ enter the model number‚ and select the manual from the available downloads. Ensure your device has a PDF viewer installed for easy access and reference. This ensures you have a convenient offline copy for troubleshooting needs.

10.3 Navigating the Digital Manual

Navigate the digital manual using the table of contents for quick access to sections. Use the search function to find specific topics or error codes. Hyperlinks guide you to related sections. Adjust zoom levels and view options for readability. Bookmark important pages for easy reference. These features enhance your troubleshooting experience‚ ensuring efficient navigation and problem-solving.

Additional Resources and Support

Access official Pentair support‚ online forums‚ and authorized service centers for assistance with troubleshooting‚ repairs‚ and maintenance. These resources provide comprehensive solutions for optimal performance.

11.1 Official Pentair Support and Contact Information

For direct assistance‚ visit the official Pentair website or contact their customer service at 1-800-831-7133. Their support team is available to address technical inquiries and provide solutions. Additionally‚ downloadable resources like the MasterTemp 400 manual and troubleshooting guides are accessible on their portal for quick reference and self-service support.

11.2 Online Forums and Communities

Online forums like Pool Forum and Facebook groups dedicated to pool maintenance offer valuable peer support. Users share experiences‚ solutions‚ and tips for troubleshooting the Pentair MasterTemp 400. These communities often discuss error codes‚ part replacements‚ and maintenance best practices‚ providing real-world insights and advice from experienced users and professionals.

11.4 Authorized Service Centers

Authorized Pentair service centers are trusted resources for professional assistance with the MasterTemp 400. These centers‚ listed on Pentair’s official website‚ offer expert repairs‚ installations‚ and maintenance. They ensure genuine parts and warranty compliance‚ providing reliable solutions for complex issues. For advanced troubleshooting or repairs beyond DIY‚ these centers are the recommended choice‚ guaranteeing safety and efficiency in resolving heater-related problems.

This manual empowers users to effectively troubleshoot and maintain their Pentair MasterTemp 400‚ ensuring optimal performance and longevity through comprehensive guides and error code explanations.

12.1 Summary of Key Points

This manual provides comprehensive troubleshooting‚ error code explanations‚ and maintenance tips for the Pentair MasterTemp 400. It covers essential diagnostic tools‚ step-by-step solutions‚ and safety precautions to ensure efficient resolution of common issues. Regular maintenance and adherence to guidelines are emphasized to prolong the heater’s lifespan and maintain peak performance. A detailed parts diagram and replacement instructions are also included for convenience.

12.2 Final Tips for Effective Troubleshooting

Always reference error codes and use diagnostic tools for accurate issue identification. Perform routine maintenance to prevent malfunctions. Consult the parts diagram for clarity on component replacement. Follow safety guidelines to avoid hazards. By adhering to these steps‚ you can resolve problems efficiently and ensure your Pentair MasterTemp 400 operates smoothly and safely.

12.3 Importance of Regular Maintenance

Regular maintenance is crucial for ensuring the Pentair MasterTemp 400 operates efficiently and safely. Routine tasks like cleaning‚ inspecting‚ and replacing worn parts prevent unexpected breakdowns. Consistent upkeep extends the heater’s lifespan‚ maintains performance‚ and reduces the risk of costly repairs. By prioritizing maintenance‚ you ensure reliable operation and optimize energy efficiency for years of trouble-free use.

how to calculate superheat and subcooling pdf

Superheat and subcooling are critical parameters in HVAC systems, influencing efficiency, performance, and equipment longevity. This guide provides a comprehensive approach to understanding and calculating these values, ensuring optimal system operation and troubleshooting. By mastering these concepts, technicians can enhance system reliability and energy efficiency, preventing costly repairs and maintaining peak performance.

Importance of Superheat and Subcooling in HVAC Systems

Superheat and subcooling are vital for ensuring HVAC system efficiency, performance, and longevity. Proper superheat prevents liquid refrigerant from entering the compressor, avoiding damage, while adequate subcooling minimizes flash gas, enhancing cooling capacity. Both parameters help diagnose issues like low refrigerant charge or condenser fouling. Accurate measurements enable technicians to optimize system operation, reduce energy consumption, and prevent costly repairs. Mastering these concepts is essential for maintaining peak performance and ensuring reliable operation in residential and commercial HVAC systems.

Basic Principles of Refrigeration Cycle

The refrigeration cycle operates on the principle of heat transfer, involving compression, condensation, subcooling, expansion, evaporation, and superheating. These stages ensure efficient heat removal from a space to a external environment. Understanding these principles is crucial for diagnosing system performance and optimizing superheat and subcooling calculations. The cycle relies on the refrigerant’s state changes, from vapor to liquid and back, to facilitate heat exchange. This fundamental process underpins all HVAC systems, making it essential for technicians to grasp its operation to effectively troubleshoot and maintain equipment.

Understanding Superheat

Superheat is the temperature difference between refrigerant vapor and its saturation temperature at a given pressure, crucial for preventing liquid refrigerant from entering the compressor and ensuring efficient evaporation. This guide explains its role in HVAC systems and provides practical tools for accurate calculation, essential for maintaining system efficiency and longevity.

Definition and Formula for Calculating Superheat

Superheat is the temperature difference between the refrigerant vapor’s actual temperature and its saturation temperature at a given pressure. The formula is: SH = Td — Ts, where SH is superheat, Td is the actual temperature of the refrigerant vapor, and Ts is the saturation temperature at the same pressure. To calculate, measure the wet bulb temperature, use a pressure-temperature chart to find Ts, and determine the temperature difference. This ensures proper evaporation and prevents liquid refrigerant from entering the compressor, optimizing system performance and efficiency. Always use a digital thermometer for accurate readings, and refer to the downloadable PDF guide for detailed examples and case studies.

Practical Applications of Superheat in HVAC Systems

Superheat ensures the refrigerant is fully vaporized before entering the compressor, preventing liquid refrigerant damage. It aids in diagnosing issues like low refrigerant charge or faulty expansion valves. Proper superheat levels optimize system efficiency, reduce energy consumption, and prevent overheating. Technicians use superheat to balance system performance, ensuring reliable operation during varying loads. Accurate superheat calculation is essential for troubleshooting and maintaining optimal HVAC system performance, as outlined in the downloadable PDF guide with practical examples and case studies.

Understanding Subcooling

Subcooling measures the temperature difference between liquid refrigerant and its saturation temperature at a given pressure, ensuring efficient heat transfer and preventing flash gas formation in HVAC systems.

Definition and Formula for Calculating Subcooling

Subcooling is the temperature difference between the liquid refrigerant’s actual temperature and its saturation temperature at a given pressure. It is calculated using the formula: Subcooling = Actual Liquid Temperature ー Saturation Temperature. This measurement ensures the refrigerant remains in a liquid state, preventing flash gas and maintaining system efficiency. Accurate calculation requires precise pressure-temperature charts specific to the refrigerant type, ensuring reliable results for optimal HVAC system performance and troubleshooting.

Practical Applications of Subcooling in HVAC Systems

Subcooling ensures the refrigerant remains in a liquid state, preventing flash gas formation, which reduces system efficiency. Proper subcooling enhances cooling capacity by ensuring the refrigerant enters the evaporator as a saturated liquid. It also helps identify system issues, such as condenser fouling or refrigerant undercharge. Maintaining optimal subcooling levels is crucial for preventing energy waste, enhancing system reliability, and extending equipment lifespan. Accurate subcooling measurements are essential for diagnosing and resolving refrigeration cycle inefficiencies, ensuring optimal HVAC performance and energy efficiency.

Step-by-Step Guide to Calculating Superheat

Measure wet bulb temperature, use a pressure-temperature chart, determine refrigerant type, calculate temperature difference, and interpret results to ensure accurate superheat calculations for optimal HVAC performance.

Step 1: Measure Wet Bulb Temperature

Begin by measuring the wet bulb temperature, which reflects the refrigerant’s saturation temperature at the evaporator coil. Use a sling psychrometer or a digital thermometer for accuracy. Ensure the thermometer is placed in the airstream near the evaporator to capture the correct reading. Avoid using mercury or dial-type thermometers for precise measurements. This step is crucial for determining the refrigerant’s state and calculating superheat effectively. Accurate wet bulb temperature ensures reliable superheat calculations, essential for system performance and troubleshooting. Always follow manufacturer guidelines for measurement tools and techniques to maintain consistency and precision in your readings.

Step 2: Use Pressure-Temperature Chart

Next, refer to a pressure-temperature (P-T) chart specific to your refrigerant type; Locate the measured pressure on the chart to determine the refrigerant’s saturation temperature. This temperature represents the boiling point of the refrigerant at the given pressure. Ensure the chart matches your refrigerant type, as pressure-temperature relationships vary. Accurate saturation temperature is crucial for calculating superheat. Use the chart to find the saturation temperature corresponding to the measured pressure, which will be used in the next step to determine superheat. Always verify the chart’s accuracy for reliable results.

Step 3: Determine Refrigerant Type

Identifying the refrigerant type is essential for accurate calculations. Each refrigerant has unique pressure-temperature relationships, and using the wrong refrigerant’s data will lead to incorrect results; Refer to the system’s specifications or the manufacturer’s documentation to confirm the refrigerant type, such as R-410A, R-134a, or R-22. Once the refrigerant is identified, you can accurately use the corresponding pressure-temperature chart to determine saturation temperatures, ensuring reliable superheat and subcooling calculations. This step is critical for maintaining system efficiency and safety.

Step 4: Calculate Temperature Difference

Once the saturation temperature is determined from the pressure-temperature chart, subtract it from the measured refrigerant temperature to find the temperature difference. For superheat, this is the difference between the actual vapor temperature and the saturation temperature at the given pressure. For subcooling, it is the difference between the liquid refrigerant temperature and the saturation temperature at condenser pressure. This calculation is critical for diagnosing system performance and ensuring optimal operating conditions. Accurate measurements are essential for reliable results.

Step 5: Interpret Results

After calculating the temperature difference, compare it to the recommended ranges for your specific refrigerant and system. For superheat, a value within the optimal range (typically 10-15°F) ensures efficient evaporation and prevents liquid refrigerant from entering the compressor. For subcooling, a value within the ideal range (usually 10-15°F) indicates proper condenser performance and prevents flash gas formation. If results are outside these ranges, investigate potential issues such as refrigerant undercharge, overcharge, or system component malfunctions, and adjust accordingly to restore optimal performance.

Step-by-Step Guide to Calculating Subcooling

Compare the calculated superheat or subcooling value to the recommended range for your refrigerant and system. If within range, the system operates efficiently. If not, identify potential issues like undercharge, overcharge, or component malfunctions. Adjust accordingly to restore optimal performance and prevent damage.

Step 1: Measure Refrigerant Pressure

Begin by measuring the refrigerant pressure using a digital manifold gauge or pressure gauge. This pressure corresponds to the refrigerant’s saturation temperature, which can be found on a pressure-temperature chart specific to the refrigerant type. Accurate pressure measurement is essential for determining the correct saturation temperature, ensuring precise superheat or subcooling calculations. Always use a gauge calibrated for the refrigerant in use to avoid errors in readings. This step is foundational for both superheat and subcooling calculations, as it provides the baseline for temperature comparisons.

Step 2: Determine Saturation Temperature

Using the measured refrigerant pressure, locate the corresponding saturation temperature on a pressure-temperature chart specific to the refrigerant type. This temperature is the refrigerant’s boiling point at the measured pressure. Using the correct chart ensures accurate calculations for superheat and subcooling, preventing errors in system performance assessments.

Step 3: Measure Liquid Line Temperature

Measure the temperature of the liquid refrigerant line using a digital thermometer or thermocouple. Ensure the sensor is placed accurately on the line to obtain a precise reading. This temperature represents the actual temperature of the liquid refrigerant after it leaves the condenser and before it enters the expansion valve. Accurate measurement is crucial for determining subcooling, as it directly affects the calculation of the temperature difference from the saturation temperature. Proper placement ensures reliable results.

To calculate the temperature difference for subcooling, subtract the saturation temperature from the measured liquid line temperature. This difference indicates how much cooler the liquid refrigerant is compared to its saturation temperature at the given pressure. Ensure accuracy by using precise temperature measurements and the correct pressure-temperature chart for your refrigerant type. This step is vital for determining the subcooling value, which helps assess system performance and identify potential issues such as insufficient cooling or refrigerant charge problems.

Once the temperature difference is calculated, compare it to the manufacturer’s recommended ranges for superheat and subcooling. For superheat, typical ranges are 10-15°F, and for subcooling, also 10-15°F, but these can vary based on the refrigerant type and system design. If the calculated values are outside these ranges, it may indicate issues such as low refrigerant charge, faulty expansion valves, or condenser problems. Accurate interpretation is crucial for diagnosing system performance and ensuring efficient operation.

Tools and Equipment for Measuring Superheat and Subcooling

Digital thermometers, pressure gauges, and P-T charts are essential tools for accurate measurements. Superheat/subcooling calculators simplify calculations, ensuring precise results for system optimization and troubleshooting.

Digital Thermometers and Pressure Gauges

Digital thermometers and pressure gauges are essential for precise measurements in calculating superheat and subcooling. Digital thermometers provide accurate temperature readings, while pressure gauges measure refrigerant pressure at specific points. Together, they ensure reliable data collection for system assessment. These tools are non-invasive and durable, making them ideal for field use; Regular calibration is crucial to maintain accuracy. By using these instruments, technicians can gather the necessary data to determine superheat and subcooling effectively, ensuring optimal HVAC system performance and troubleshooting.

Pressure-Temperature Charts

Pressure-temperature (PT) charts are vital tools for calculating superheat and subcooling in HVAC systems. These charts map refrigerant pressure to corresponding saturation temperatures, enabling precise calculations. By referencing a PT chart, technicians can determine the saturation temperature of the refrigerant at a given pressure, which is essential for both superheat and subcooling calculations. Accurate PT charts specific to the refrigerant type ensure reliable results. They are indispensable for diagnosing system performance and maintaining efficiency, making them a cornerstone of refrigeration and air conditioning troubleshooting and maintenance practices.

Superheat/Subcooling Calculators

Superheat and subcooling calculators simplify the process of determining these critical values. These tools, often included in PDF guides or digital software, allow technicians to input pressure and temperature readings to calculate superheat and subcooling quickly. They eliminate the need for manual chart referencing, reducing errors and saving time. Many calculators are designed for specific refrigerants, ensuring accuracy. By streamlining the calculation process, these tools enhance efficiency and precision, making them invaluable for HVAC professionals aiming to optimize system performance and troubleshoot effectively.

Downloadable PDF Guide

A comprehensive downloadable PDF guide provides detailed formulas, charts, and practical examples for calculating superheat and subcooling, serving as an invaluable resource for HVAC professionals and students alike.

The superheat formula is calculated as the difference between the refrigerant’s actual temperature and its saturation temperature at a given pressure. For subcooling, it is the difference between the saturation temperature and the refrigerant’s actual liquid temperature. These calculations are essential for diagnosing system performance, ensuring efficient operation, and preventing damage. Accurate measurements using pressure-temperature charts and thermometers are critical for reliable results. This guide provides clear, step-by-step instructions to master these calculations and apply them effectively in real-world scenarios.

Practical Examples and Case Studies

Real-world examples demonstrate how superheat and subcooling calculations resolve common HVAC issues. For instance, a residential AC system with excessive superheat indicated low refrigerant charge, while insufficient subcooling revealed condenser airflow problems. Case studies show how accurate measurements using thermometers and pressure charts led to timely repairs, improving efficiency and preventing equipment failure. These practical scenarios highlight the importance of mastering these calculations for effective troubleshooting and system optimization.

Quick Reference Tables and Charts

The PDF guide includes quick reference tables and charts for common refrigerants like R-410A and R-134a, providing saturation temperatures, pressure-temperature correlations, and typical superheat/subcooling ranges. These visual tools simplify field calculations, enabling technicians to quickly verify system performance against benchmarks. Charts outline optimal temperature-pressure relationships, while tables summarize standard superheat and subcooling values for various applications, ensuring efficient and accurate troubleshooting. This section serves as an essential on-the-job reference for HVAC professionals.

Frequently Asked Questions

This section addresses common inquiries about superheat and subcooling, such as typical ranges for residential systems, using digital thermometers, consequences of excessive superheat, and refrigerant-specific P-T charts.

Q1: Typical Ranges for Residential AC Systems

For residential AC systems, typical superheat ranges are 10-15°F (5-8°C), while subcooling typically ranges from 10-15°F (5-8°C). These values ensure efficient operation and prevent damage. However, exact ranges may vary depending on the refrigerant type and system design. Always refer to the manufacturer’s specifications for precise guidelines, as deviations can indicate system issues like low refrigerant charge or faulty components. Proper ranges ensure optimal performance, energy efficiency, and longevity of the HVAC system.

Q2: Using Digital Thermometers

Digital thermometers are suitable for measuring superheat and subcooling, offering accuracy and ease of use. Ensure they are calibrated and compatible with the temperature range of your system. While thermocouples are often preferred for their robustness, digital thermometers provide reliable readings when properly maintained. Regular calibration is essential to ensure measurement accuracy, which is critical for correct superheat and subcooling calculations. Always follow the manufacturer’s guidelines for optimal performance and reliable data collection in HVAC systems.

Q3: Consequences of Excessive Superheat

Excessive superheat can lead to reduced system efficiency and increased energy consumption. It indicates potential issues such as low refrigerant charge or problems with the expansion valve. High superheat can also cause the compressor to work harder, leading to increased wear and tear. Additionally, it may result in decreased cooling capacity, as the refrigerant is not efficiently absorbing heat. Addressing excessive superheat is crucial to maintain optimal performance, prevent system damage, and ensure energy efficiency in HVAC systems. Regular monitoring and adjustments are essential to avoid these consequences.

Q4: Importance of Refrigerant-Specific P-T Charts

Using refrigerant-specific P-T charts is crucial for accurate superheat and subcooling calculations. Each refrigerant has unique pressure-temperature relationships, and using the wrong chart leads to incorrect measurements. This can result in improper system operation, reduced efficiency, or even equipment damage. Accurate readings ensure proper system performance and help diagnose issues effectively. Always consult the manufacturer’s specifications for the correct P-T chart to avoid errors and ensure reliable results in HVAC system maintenance and troubleshooting.

classroom behavior report card resources book.pdf

The Classroom Behavior Report Card Resources Book.pdf is a comprehensive guide designed to help teachers effectively assess and manage student behavior. It offers customizable templates‚ rating scales‚ and practical strategies to promote positive behavior and streamline classroom management‚ ensuring a structured and supportive learning environment for all students.

Overview of the Resource Book

The Classroom Behavior Report Card Resources Book.pdf serves as a detailed guide for educators‚ providing practical tools and strategies to monitor and improve student behavior. It includes pre-formatted templates‚ customizable features‚ and behavior rating scales to ensure consistency and accuracy in assessing student conduct. The book is designed to help teachers create behavior report cards that align with classroom expectations‚ offering a structured approach to promoting positive behavior. With its comprehensive resources‚ the book supports teachers in identifying behavioral strengths and areas for improvement. It also includes discussion cards and progress monitoring graphs to facilitate meaningful conversations and track student growth over time. This resource is ideal for educators seeking to create a supportive learning environment and streamline classroom management effectively. By providing actionable insights and adaptable tools‚ the book empowers teachers to address behavioral challenges proactively and foster a positive classroom culture.

Importance of Classroom Behavior Management

Effective classroom behavior management is essential for creating a productive and respectful learning environment. It helps teachers maintain focus on instruction while ensuring students engage positively with academic tasks. Positive behavior management fosters a culture of respect‚ reduces disruptions‚ and promotes social and academic growth. By addressing behavioral challenges early‚ teachers can prevent minor issues from escalating‚ ensuring a safe and inclusive space for all students. Consistent behavior management also strengthens teacher-student relationships‚ encouraging open communication and mutual respect. This foundation is critical for maximizing learning outcomes and helping students develop self-regulation skills. The Classroom Behavior Report Card Resources Book.pdf emphasizes these principles‚ providing tools to support educators in creating a structured and supportive classroom environment that benefits every student.

Key Features of the Classroom Behavior Report Card Resources Book

The Classroom Behavior Report Card Resources Book offers pre-formatted templates‚ customizable features‚ and behavior rating scales to ensure consistency and adaptability for diverse classroom needs.

Pre-Formatted Behavior Report Card Templates

The Classroom Behavior Report Card Resources Book provides a variety of pre-formatted behavior report card templates tailored for different grade levels and classroom needs. These templates are designed to simplify the process of monitoring and documenting student behavior‚ offering a structured format that includes sections for assessing behaviors such as participation‚ responsibility‚ and respect. Teachers can easily customize these templates to align with specific classroom expectations and goals. Additionally‚ the templates are available in both color and black-and-white formats‚ making them versatile for various printing preferences. By using these templates‚ educators can efficiently track student progress and provide constructive feedback‚ fostering a positive and productive learning environment. This feature ensures that behavior management is both consistent and effective‚ allowing teachers to focus on supporting their students’ growth and development.

Customizable Features for Classroom Needs

The Classroom Behavior Report Card Resources Book.pdf offers customizable features that cater to the unique needs of each classroom. Teachers can tailor behavior report cards to focus on specific behaviors‚ such as participation‚ respect‚ or responsibility‚ ensuring that the assessments align with classroom expectations. The templates allow for adjustments in language‚ categories‚ and evaluation criteria‚ making them adaptable for different grade levels and student populations. Additionally‚ the resource provides tools for creating personalized behavior rating scales‚ enabling educators to monitor progress effectively. These customizable features empower teachers to design behavior management systems that are both flexible and targeted‚ fostering a positive learning environment. By allowing for such personalization‚ the book supports teachers in addressing diverse classroom dynamics and individual student needs‚ ensuring that behavior management is both effective and meaningful. This adaptability makes the resource invaluable for educators seeking tailored solutions.

Behavior Rating Scales for Consistency

The Classroom Behavior Report Card Resources Book.pdf includes behavior rating scales designed to ensure consistency in assessing student behavior. These scales provide a standardized framework for evaluating behaviors such as participation‚ respect‚ and responsibility‚ allowing teachers to monitor progress accurately. The resource offers pre-formatted rating systems‚ making it easier to maintain uniformity across assessments. By using these scales‚ educators can identify patterns in student behavior and address areas needing improvement. The consistency provided by these tools helps in creating a fair and reliable system for behavior evaluation‚ enabling teachers to make informed decisions. Additionally‚ the book’s behavior rating scales report card maker allows for the creation of tailored assessments‚ ensuring alignment with classroom expectations while maintaining consistency. This feature supports a structured approach to behavior management‚ benefiting both teachers and students.

Benefits of Using the Classroom Behavior Report Card

The Classroom Behavior Report Card enhances classroom management by promoting positive behavior and providing clear insights into student conduct. It streamlines tracking and supports data-driven decision-making for improved outcomes.

Promoting Positive Student Behavior

Promoting positive student behavior is a cornerstone of effective classroom management‚ and the Classroom Behavior Report Card Resources Book.pdf provides tools to achieve this goal. By using daily behavior report cards‚ teachers can reinforce good behavior and address challenges promptly‚ fostering a supportive learning environment. The resource includes customizable templates and rating scales that allow educators to track progress and provide constructive feedback. These tools encourage students to reflect on their actions‚ helping them develop self-awareness and accountability. Additionally‚ the book offers discussion cards that engage students in conversations about appropriate behavior‚ promoting a positive classroom culture. By focusing on encouragement and growth‚ the resource helps teachers cultivate a mindset of improvement‚ ensuring students feel motivated to meet expectations and thrive academically and socially. This approach creates a foundation for long-term behavioral success and a positive school experience.

Streamlining Classroom Management

The Classroom Behavior Report Card Resources Book.pdf simplifies classroom management by providing practical tools to monitor and address student behavior efficiently. With pre-formatted templates and customizable features‚ teachers can quickly create behavior report cards tailored to their classroom needs‚ saving time and reducing administrative burdens. The resource includes behavior rating scales that ensure consistency in tracking student conduct‚ allowing educators to identify patterns and address challenges promptly. Daily behavior reports also enable teachers to maintain open communication with students and parents‚ fostering collaboration in supporting student growth. By streamlining these processes‚ the book helps teachers focus more on instruction and less on managing disruptions‚ creating a more structured and productive learning environment. These tools empower educators to implement effective strategies that promote accountability and consistency‚ ensuring a well-managed classroom where students can thrive academically and socially.

How to Implement the Classroom Behavior Report Card

Select the right report card template‚ monitor behavior daily‚ and align it with classroom expectations. Regularly review and discuss reports with students to ensure understanding and improvement‚ fostering accountability and growth.

Steps to Select the Right Behavior Report Card

Selecting the right behavior report card involves identifying the specific behavioral concerns and classroom needs. Review the pre-formatted templates in the resource book‚ focusing on page headers for useful information. Choose a card that aligns with your classroom expectations and the student’s behavioral goals. Consider customization options to tailor the report to individual or class needs. Ensure the selected card includes behavior rating scales for consistency in tracking progress. Align the report card with the student’s developmental level and the behaviors you want to monitor. Finally‚ test the card with a small group or individual student to assess its effectiveness before wider implementation. This step-by-step approach ensures the report card is both practical and impactful for promoting positive behavior and improving classroom management. Regular review and adjustment of the card can further enhance its effectiveness.

Using Daily Behavior Reports Effectively

Daily behavior reports are a powerful tool for monitoring and improving student behavior. To use them effectively‚ review the reports with students daily‚ discussing their progress and setting clear goals for improvement. This consistent feedback loop helps students understand their actions and develop self-regulation skills. Customize the reports to focus on specific behaviors aligned with classroom expectations‚ ensuring they are relevant and actionable. Use the behavior rating scales provided in the resource book to maintain consistency and objectivity in assessments. Encourage students to reflect on their behavior‚ identifying strengths and areas for growth. Parents and guardians can also be involved by sharing the reports and collaborating on strategies. By integrating daily behavior reports into your classroom routine‚ you can create a structured and supportive environment that fosters positive behavior and academic success. Regular use of these reports helps build accountability and promotes a growth mindset in students.

Aligning Report Cards with Classroom Expectations

Aligning behavior report cards with classroom expectations ensures consistency and clarity in behavior management. Teachers can customize the report cards to reflect specific classroom rules and behavioral goals‚ making them more relevant and effective. By incorporating key expectations into the report card design‚ educators can clearly communicate standards to students and parents. This alignment helps students understand what behaviors are valued and how they can meet those expectations. The resource book provides templates that can be tailored to match classroom-specific criteria‚ ensuring that the behavior assessment process supports the overall classroom environment. Consistent alignment also helps in tracking progress over time‚ allowing for targeted interventions and positive reinforcement. This approach fosters a structured and goal-oriented classroom culture‚ promoting accountability and encouraging students to take ownership of their behavior.

Reviewing and Discussing Reports with Students

Reviewing and discussing behavior reports with students is a critical step in fostering accountability and understanding. The Classroom Behavior Report Card Resources Book.pdf emphasizes the importance of conducting these discussions in a supportive and constructive manner. Teachers are encouraged to use the report card as a tool to engage students in conversations about their behavior‚ helping them identify strengths and areas for improvement. By reviewing the report together‚ students gain insight into their actions and their impact on the classroom environment. This process also provides an opportunity to set specific‚ achievable goals for behavior improvement. The book offers guidance on how to frame discussions positively‚ ensuring students feel encouraged rather than discouraged. Regular reviews and discussions help students develop self-awareness and take ownership of their behavior‚ promoting a more responsible and engaged classroom community. This collaborative approach strengthens the teacher-student relationship and supports overall behavioral growth.

Tools and Resources for Behavior Management

The Classroom Behavior Report Card Resources Book.pdf offers essential tools like the Behavior Rating Scales Report Card Maker and Progress Monitoring Graphs to track student behavior effectively. These resources help teachers identify patterns‚ set goals‚ and implement interventions‚ ensuring consistent and data-driven behavior management strategies. Additionally‚ the book provides Classroom Behavior Discussion Cards to foster open conversations about behavior‚ creating a collaborative environment for growth and improvement.

Behavior Rating Scales Report Card Maker

The Behavior Rating Scales Report Card Maker is a versatile tool within the Classroom Behavior Report Card Resources Book.pdf that enables teachers to create customized behavior rating scales. These scales allow educators to consistently monitor and evaluate student behavior across key areas such as attention‚ cooperation‚ and self-regulation. By providing a structured format‚ the tool ensures accuracy and fairness in assessing student conduct. Teachers can use these scales to identify patterns in behavior‚ track progress over time‚ and set realistic goals for improvement. The maker also supports the development of individualized behavior plans‚ making it easier to address specific student needs. With its user-friendly design‚ the Behavior Rating Scales Report Card Maker is an invaluable resource for promoting positive behavior and fostering a supportive classroom environment. It aligns seamlessly with other tools in the book‚ enhancing the overall effectiveness of behavior management strategies.

Progress Monitoring and Graphs

Progress monitoring and graphs are essential tools within the Classroom Behavior Report Card Resources Book.pdf for tracking student behavior over time. These features allow teachers to visualize progress‚ identify trends‚ and make data-driven decisions. The book provides customizable graphs and charts that can be tailored to individual student needs‚ making it easier to monitor improvements or areas requiring additional support. By regularly updating these graphs‚ educators can demonstrate growth to students‚ parents‚ and administrators‚ fostering a sense of accomplishment and motivation. The inclusion of clear‚ visual representations of behavior data also helps in setting realistic goals and adjusting interventions as needed. This tool is particularly effective for students who benefit from seeing their progress‚ as it reinforces positive behavior and encourages accountability. The ability to track and display progress makes it a powerful component of the resource book’s comprehensive behavior management system.

Classroom Behavior Discussion Cards

The Classroom Behavior Discussion Cards are a valuable resource within the Classroom Behavior Report Card Resources Book.pdf‚ designed to foster meaningful conversations about behavior in the classroom. These teacher-created cards prompt students to reflect on what a positive learning environment looks‚ sounds‚ and feels like. Available in printable PDF formats‚ they can be used for whole-class discussions or small group activities‚ making them adaptable to various classroom needs. Each card addresses common behavioral themes‚ such as classroom safety‚ respect for peers‚ and collaboration‚ encouraging students to think critically about appropriate behavior. This tool not only helps students understand expectations but also empowers them to take an active role in creating a positive classroom culture. The discussion cards are a practical and engaging way to reinforce behavior management strategies and promote a supportive learning environment. They align seamlessly with the book’s focus on fostering positive behavior and providing educators with versatile resources for effective classroom management.

Classroom Behavior Management Strategies

The Classroom Behavior Report Card Resources Book.pdf provides practical strategies for creating a positive learning environment‚ setting clear expectations‚ and using visual aids to support behavior management‚ ensuring a structured and respectful classroom setting for all students.

Creating a Positive Learning Environment

Creating a positive learning environment is essential for fostering student engagement and responsible behavior. The Classroom Behavior Report Card Resources Book.pdf emphasizes the importance of establishing a supportive classroom culture where students feel valued and motivated. By implementing strategies such as clear communication‚ consistent expectations‚ and positive reinforcement‚ educators can cultivate a respectful and inclusive atmosphere. The resource provides practical tools‚ including discussion cards and behavior rating scales‚ to help teachers encourage collaboration and empathy among students. Additionally‚ it offers tips on using visual aids and daily behavior reports to reinforce positive conduct. By integrating these methods‚ teachers can create a structured yet nurturing environment that promotes social and academic growth‚ ensuring students are well-equipped to succeed both individually and collectively.

Setting Clear Classroom Expectations

Setting clear classroom expectations is crucial for effective behavior management and academic success. The Classroom Behavior Report Card Resources Book.pdf provides tools to help educators establish and communicate consistent behavioral standards. By using pre-formatted templates and customizable features‚ teachers can create expectations that align with their classroom goals. The resource emphasizes the importance of involving students in understanding and committing to these expectations‚ fostering a sense of responsibility and accountability. Discussion cards and behavior rating scales further support this process‚ ensuring clarity and consistency. Clear expectations not only promote positive behavior but also create a structured environment where students can thrive academically and socially. This approach helps reduce misunderstandings and encourages a focused‚ respectful classroom atmosphere.

Using Visual Aids for Behavior Support

Visual aids are a powerful tool for reinforcing positive behavior in the classroom. The Classroom Behavior Report Card Resources Book.pdf includes templates for behavior charts‚ color-coded systems‚ and progress monitoring graphs to help students visualize their behavior and track improvements. These tools are particularly effective for students who respond well to visual cues‚ including those with special needs. By displaying expectations and progress clearly‚ teachers can help students understand and meet behavioral goals. The resource book also provides discussion cards and check-in/check-out systems that can be paired with visual aids to create a comprehensive support system. Visual aids promote consistency‚ clarity‚ and motivation‚ making it easier for students to take ownership of their behavior and develop self-regulation skills. This approach ensures that behavioral expectations are both accessible and actionable for all learners.

Case Studies and Real-World Applications

The Classroom Behavior Report Card Resources Book.pdf shares real-world success stories from teachers who implemented its strategies. These case studies highlight improved student behavior‚ reduced disruptions‚ and enhanced academic engagement‚ demonstrating the practical effectiveness of the resource.

Success Stories from Teachers Using the Resource Book

Teachers who have utilized the Classroom Behavior Report Card Resources Book.pdf share inspiring success stories. Many report significant improvements in student behavior‚ such as increased focus and reduced disruptions. One teacher noted that the customizable templates and behavior rating scales helped her identify specific areas of concern and develop targeted interventions. Another educator highlighted how the daily behavior reports fostered positive communication with students and parents‚ leading to better accountability and motivation. The resource book’s practical tools‚ such as discussion cards‚ have also been praised for encouraging reflective conversations about classroom behavior. These real-world applications demonstrate how the book empowers teachers to create a more structured and supportive learning environment‚ ultimately enhancing student outcomes and overall classroom dynamics.

Overcoming Common Behavioral Challenges

The Classroom Behavior Report Card Resources Book.pdf provides practical strategies to address common behavioral challenges‚ such as disruptions‚ disrespect‚ and lack of focus. By utilizing tools like behavior rating scales and progress monitoring‚ teachers can identify root causes of misbehavior and implement targeted interventions; The book offers customizable solutions to help students develop self-regulation skills and take responsibility for their actions. For example‚ daily behavior reports allow teachers to track progress and provide constructive feedback‚ fostering positive changes over time. Additionally‚ classroom discussion cards encourage students to reflect on their behavior‚ promoting a deeper understanding of classroom expectations. These resources empower educators to create a supportive environment where students can thrive‚ even in the face of behavioral difficulties‚ ensuring a more productive and respectful classroom atmosphere.

The Classroom Behavior Report Card Resources Book.pdf is an invaluable tool for effective behavior management‚ offering practical strategies and customizable templates. For further support‚ explore additional resources like behavior discussion cards and progress monitoring tools to enhance classroom success.

Final Thoughts on Effective Behavior Management

Effective classroom behavior management is essential for creating a positive and productive learning environment. Tools like the Classroom Behavior Report Card Resources Book.pdf provide educators with structured methods to monitor and improve student behavior. By using daily behavior reports‚ teachers can identify areas needing attention and implement targeted interventions. Consistency and clear communication are key‚ as they help students understand expectations and develop self-regulation skills. Additionally‚ incorporating visual aids and discussion cards can further enhance behavior management strategies. The resource book offers practical solutions‚ making it a valuable asset for educators aiming to foster a supportive and structured classroom culture. Regular review and discussion of behavior reports with students ensure they feel heard and motivated to improve‚ leading to a more engaged and respectful classroom community.

Recommended Resources for Further Reading

For educators seeking to deepen their understanding of behavior management‚ several resources complement the Classroom Behavior Report Card Resources Book.pdf. The RTI Daily Behavior Report (RTI-DBR) offers insights into monitoring student behavior effectively. Additionally‚ books like “Behavior Management: A Practical Approach for Educators” provide evidence-based strategies. Online tools such as Intervention Central offer customizable templates and progress monitoring graphs; Teachers can also explore Classroom Behavior Discussion Cards for fostering student reflection on behavior. Printable resources like Daily Behavior Report Templates and Behavior Rating Scales are excellent for consistent tracking. These resources‚ combined with the strategies outlined in the Classroom Behavior Report Card Resources Book.pdf‚ create a comprehensive toolkit for effective behavior management. By integrating these materials‚ educators can build a supportive and structured classroom environment tailored to student needs.

manual toro tmc 212

The Toro TMC-212 is a robust and sophisticated irrigation controller designed for residential, commercial, and municipal applications. It combines advanced technology with user-friendly operation, offering flexible scheduling and customizable programs. This manual provides a comprehensive guide to installation, programming, and troubleshooting, ensuring optimal performance and ease of use for all users.

1.1 Overview of the Toro TMC-212 Irrigation Controller

The Toro TMC-212 is a cutting-edge irrigation controller designed to deliver efficient and customizable water management solutions. Its robust design and advanced features make it suitable for residential, commercial, and municipal applications. The controller offers a user-friendly interface with a control dial and program select switch, enabling easy navigation through programming and operation. The TMC-212 supports up to three independent watering programs (A, B, and C), each with up to four start times, providing flexibility for diverse watering needs. It also features a rain sensor circuit and surge protection to ensure reliable performance. The controller’s modular design allows for expansion with additional stations, making it adaptable to various landscape sizes and complexities. With its intuitive operation and advanced capabilities, the TMC-212 is a versatile tool for maintaining healthy landscapes while conserving water. This manual provides detailed guidance on installing, programming, and maintaining the Toro TMC-212 for optimal results.

1.2 Key Features and Benefits

The Toro TMC-212 irrigation controller offers a range of innovative features designed to enhance watering efficiency and system reliability. It supports up to three independent watering programs (A, B, and C), each with up to four start times, providing flexibility for varied landscaping needs. The controller also includes a rain sensor circuit, which adjusts watering schedules based on weather conditions to conserve water. Surge protection is built-in to safeguard the system from power surges, ensuring long-term durability. The TMC-212 is modular, allowing for easy expansion with additional stations to accommodate larger or more complex irrigation systems. Its user-friendly interface, featuring a control dial and program select switch, simplifies programming and operation. These features collectively ensure precise water delivery, reduced waste, and optimal landscape health. The TMC-212 is a reliable and adaptable solution for both small-scale residential use and larger commercial or municipal applications.

1.3 Target Applications (Residential, Commercial, Municipal)

The Toro TMC-212 irrigation controller is designed to meet the needs of various applications, making it a versatile solution for different settings. For residential use, it is ideal for homeowners seeking to manage small to medium-sized landscapes efficiently. Its user-friendly interface and customizable programs allow for precise watering schedules tailored to lawn and garden needs. In commercial settings, such as office complexes, parks, and golf courses, the TMC-212 excels at handling larger-scale irrigation requirements with its modular design and expandable station capacity. Municipal applications, including public spaces and sports fields, benefit from its reliability and durability, ensuring consistent water delivery even in demanding environments. Whether for a small residential yard or a large municipal area, the TMC-212 delivers efficient water management and adaptability, making it a reliable choice across diverse applications.

Installation and Setup

The Toro TMC-212 installation and setup process involves hardware requirements, step-by-step guides, wiring, and connectivity instructions. The manual provides detailed steps to ensure a smooth setup experience for all users.

2.1 Hardware Requirements and Compatibility

The Toro TMC-212 controller requires specific hardware components for proper installation and operation. It supports up to 12 stations when using the TSM-02 expansion modules. The base model includes four stations, with the option to expand using two-station modules. Compatibility with surge protection devices ensures system safety. The controller is designed for both indoor and outdoor installations, with mounting brackets provided for secure placement. Wiring requirements include connecting valves and sensors according to the manual’s detailed instructions. Power supply specifications must be adhered to, ensuring the controller operates within recommended voltage ranges. Additional hardware, such as rain sensors, can be integrated for enhanced functionality. Proper hardware selection and installation are critical to ensure optimal performance and longevity of the system. Always refer to the manual for specific compatibility guidelines and installation best practices.

2.2 Step-by-Step Installation Guide

Begin by mounting the Toro TMC-212 controller in a secure, dry location. For indoor models, use the provided mounting bracket, and for outdoor models, attach the unit to the cabinet’s designated area. Next, connect the valves and sensors to the controller, ensuring wires are securely attached to the appropriate terminals. Follow the wiring diagram in the manual to avoid errors. Install the TSM-02 expansion modules if additional stations are required, ensuring they are compatible with the base unit. After wiring, set the clock and date on the controller. Finally, test the system by manually activating each zone to ensure proper functionality. Refer to the manual for detailed diagrams and troubleshooting tips if issues arise during installation. Proper installation ensures reliable operation and longevity of the Toro TMC-212 irrigation controller.

2.3 Wiring and Connectivity Instructions

The Toro TMC-212 controller requires careful wiring to ensure proper functionality. Begin by connecting the main power supply to the terminal labeled “Power” on the controller. Next, attach the valve wires to the corresponding station terminals, ensuring they match the correct zones. Use the wiring diagram in the manual for accurate connections. If expansion modules (e.g., TSM-02) are installed, connect them to the base unit following the manufacturer’s guidelines. Surge protection devices should be installed to safeguard the controller from voltage spikes. Sensors, such as rain sensors, should be connected to the designated input terminals. Ground the system properly to prevent damage from electrical surges. Double-check all connections for tightness and accuracy. Finally, test the system by manually activating each zone to ensure proper operation. Refer to the manual for detailed wiring diagrams and troubleshooting tips if issues arise during the process.

Programming and Operation

The Toro TMC-212 offers intuitive programming with a control dial and program select switch for easy operation. Users can set watering programs, start times, and customize schedules with flexibility and ease.

3.1 Understanding the Control Dial and Program Select Switch

The Toro TMC-212 features a user-friendly interface with a control dial and a program select switch, designed to simplify programming and operation. The control dial allows users to navigate through various settings and options, making it easy to configure watering schedules and adjust parameters. The program select switch enables users to choose between three independent watering programs (A, B, and C), each with customizable start times and schedules. This flexibility ensures that different areas of the landscape can be watered according to their specific needs. Additionally, the control dial can be used to manually start or pause watering cycles, providing quick access to essential functions. The program select switch also plays a role in manual operation, allowing users to override scheduled programs when necessary. Understanding these components is key to maximizing the controller’s functionality and ensuring efficient irrigation management.

3.2 Setting Up Watering Programs (A, B, C)

The Toro TMC-212 allows users to create and customize three independent watering programs (A, B, and C), each with up to four start times. To set up a program, select the desired program (A, B, or C) using the program select switch. Next, use the control dial to set the start time, water duration, and frequency for each zone. Each program can be tailored to meet specific irrigation needs, such as different zones requiring varying water amounts. The controller also supports manual overrides, enabling temporary adjustments without altering the scheduled programs. This flexibility ensures efficient water management and accommodates diverse landscaping requirements. By configuring these programs, users can optimize water usage and maintain healthy vegetation across their property.

3.3 Assigning Start Times and Customizing Schedules

The Toro TMC-212 allows users to assign up to four start times for each watering program (A, B, and C), providing flexibility for diverse irrigation needs. To customize schedules, use the control dial to navigate to the start time menu and set the desired times for each program. Programs can be scheduled to run at specific intervals, such as daily, every other day, or weekly, depending on the selected frequency. The controller also allows for manual start operations without altering the programmed schedules. This feature is particularly useful for temporary adjustments or testing zones. By customizing start times and frequencies, users can optimize water usage and ensure proper hydration for different zones. The TMC-212’s scheduling system is designed to be intuitive, making it easy to tailor irrigation plans for varying landscape requirements while promoting water conservation.

Advanced Features

The Toro TMC-212 includes advanced features like rain sensor compatibility, surge protection, and expansion modules, enhancing its functionality and adaptability for complex irrigation systems while ensuring reliable performance and safety.

4.1 Rain Sensor and Weather-Based Adjustments

The Toro TMC-212 supports integration with a rain sensor, enabling weather-based adjustments to irrigation schedules. This feature ensures that watering sessions are automatically paused or skipped during rainfall, preventing overwatering and conserving water. The rain sensor detects moisture levels and communicates with the controller to modify watering programs accordingly. This integration enhances system efficiency and promotes water conservation. Users can customize settings to align with local weather conditions, ensuring optimal irrigation without waste. The rain sensor is an optional accessory but highly recommended for areas with frequent rainfall or varying weather patterns. By incorporating real-time weather data, the TMC-212 adapts to environmental changes, reducing the need for manual adjustments and ensuring landscapes receive the right amount of water. This advanced feature is particularly beneficial for commercial and municipal applications where water management is critical.

4.2 Surge Protection and Circuit Safety

The Toro TMC-212 irrigation controller is equipped with built-in surge protection to safeguard the system from power surges and voltage spikes. This feature helps prevent damage to the controller and connected components, ensuring long-term reliability. The TSM-02-H expansion module provides additional surge protection, rated for up to 6.0 Kv, further enhancing system safety. Proper wiring and installation are critical to maintaining circuit safety, as outlined in the manual. Users should ensure all connections are secure and follow the recommended guidelines to avoid electrical hazards. Regular inspections of the system and cables are advised to identify and address potential issues before they escalate. By integrating surge protection and adhering to safety protocols, the TMC-212 minimizes risks associated with power fluctuations, providing a robust and reliable irrigation solution for residential, commercial, and municipal applications. This focus on safety ensures uninterrupted performance and protects the investment in the irrigation system.

4.3 Expansion Modules and Station Management

The Toro TMC-212 irrigation controller supports expansion modules to increase station capacity, offering flexibility for larger or more complex irrigation systems. The TSM-02 is a standard two-station expansion module that provides cost-effective station count flexibility. It is interchangeable with all TMC-212 models, allowing users to easily expand their system as needed. The module can be installed indoors or outdoors, depending on the controller model, and integrates seamlessly with the base unit. The TSM-02-H module, specifically designed for surge protection, offers up to 6.0 Kv of protection when installed correctly. This ensures enhanced safety and reliability for the entire system. Station management is streamlined, allowing users to assign specific zones to different programs (A, B, or C) and customize their irrigation schedules. The modular design of the TMC-212 makes it scalable, catering to both small residential setups and large commercial or municipal applications, ensuring efficient water management across various landscapes.

Maintenance and Troubleshooting

Regular maintenance ensures optimal performance of the Toro TMC-212. Clean debris from sensors, check wiring, and update software. Troubleshoot common issues like sensor malfunctions or power loss, and reset the controller if needed.

5.1 Regular Maintenance Tips for Optimal Performance

Regular maintenance is essential to ensure the Toro TMC-212 operates efficiently and effectively. Start by cleaning debris from sensors and checking wiring for damage or corrosion. Update software periodically to access new features and security updates. Inspect the controller’s environment to ensure it remains dry and free from pests. For outdoor models, verify that the cabinet is securely closed to protect internal components. Check the battery backup to prevent data loss during power outages. Additionally, review watering schedules seasonally to adapt to changing conditions. Refer to the manual for specific maintenance intervals and procedures. By following these tips, you can extend the lifespan of your Toro TMC-212 and maintain reliable irrigation control. Regular checks also help identify and address potential issues before they escalate, ensuring continuous performance. Always follow safety guidelines when performing maintenance tasks.

5.2 Common Issues and Solutions

Common issues with the Toro TMC-212 can often be resolved with simple troubleshooting; If the system fails to start automatically, check the program schedules and ensure the correct start times are set. For zones not watering properly, inspect valves and wiring for damage or blockages. If the display is not showing, verify power supply and ensure the backlight is enabled. After a power loss, reset the time and date, as these are not retained in memory. If the rain sensor is not functioning, clean it or replace it if damaged. For manual operation issues, ensure the Manual Start button is pressed correctly. Consult the manual for detailed diagnostic steps. If problems persist, contact Toro customer support for assistance. Regular maintenance and updates can prevent many of these issues, ensuring smooth operation. Always refer to the troubleshooting section in the manual for specific guidance.

5.3 Resetting the Controller After Power Loss

If the Toro TMC-212 loses power for an extended period, the controller will retain most of its settings, but the time and date will need to be reset. To restore functionality, simply power on the controller and use the control dial to navigate to the clock settings. Enter the correct time and date manually. Programmed watering schedules and custom settings remain stored in memory and do not require reconfiguration. However, if the power loss exceeds 24 hours, only the time and date will need to be reset. Other features like watering programs and sensor settings are preserved. For manual operation, ensure the Manual Start button is used correctly if needed. Always refer to the manual for detailed instructions on resetting and recovering settings after a power interruption.

Additional Resources

Access the full Toro TMC-212 manual online or download it in PDF format. A Quick Reference Guide is also available for easy access. For further assistance, visit Toro.com or contact their customer support team for troubleshooting and warranty inquiries.

6.1 Accessing the Full Toro TMC-212 Manual Online

To access the full Toro TMC-212 manual online, visit the official Toro website or reputable sources like ManualsBrain.com. The manual is available in PDF format for easy download or viewing. It is divided into six main sections, covering installation, programming, and troubleshooting. The document includes detailed descriptions of components, operating modes, and advanced features. Users can print selected pages or the entire manual for convenience. Additional resources, such as a Quick Reference Guide, are also provided to simplify navigation. The manual is designed to be user-friendly, ensuring optimal performance and ease of use for residential, commercial, and municipal applications. For further assistance, Toro’s customer support team is available to address any questions or concerns.

  • Visit Toro.com or ManualsBrain.com for direct access.
  • Download the PDF for offline use or print specific sections.
  • Refer to the Quick Reference Guide for fast troubleshooting.

6.2 Quick Reference Guide and Printed Manual Options

The Toro TMC-212 controller comes with a Quick Reference Guide, designed to provide fast access to essential information for setup and operation. This guide is included in the user manual and should be kept near the controller for easy access. For outdoor models, the guide can be hung on a hook inside the cabinet. Additionally, the full manual can be printed, allowing users to have a physical copy for reference. The manual is organized into clear sections, making it easy to navigate. Whether you prefer digital or printed formats, Toro ensures comprehensive support for all users. The Quick Reference Guide and printed manual options are ideal for those who want quick solutions or detailed instructions at their fingertips.

  • Quick Reference Guide provides fast troubleshooting and setup tips.
  • Printed manual offers a physical copy for easy access.
  • Manual sections are clearly organized for user convenience.

6.3 Customer Support and Warranty Information

Toro provides comprehensive customer support for the TMC-212 controller, ensuring users have access to assistance when needed. The product is backed by a limited warranty that covers defects in materials and workmanship for a specified period. For detailed warranty terms, users should refer to the manual or visit Toro’s official website. Support options include online resources, such as FAQs and troubleshooting guides, as well as direct contact via phone or email. Toro’s customer service team is available to address technical inquiries and provide guidance on installation, programming, or maintenance. Additionally, the manual includes information on how to register the product and access warranty services. For any issues, users are encouraged to contact Toro’s support team or visit an authorized service center. This ensures optimal performance and longevity of the TMC-212 controller.

  • Comprehensive customer support options available.
  • Limited warranty covers parts and labor for a specified period;
  • Online resources and direct contact options for assistance.

window guide clips

Window guide clips are essential components that ensure smooth operation of windows, guiding sashes and preventing misalignment. They enhance functionality and durability, making them a crucial part of window systems.

1.1 What Are Window Guide Clips?

Window guide clips are small, durable components designed to guide and stabilize window sashes or panels as they open and close. Typically made from materials like plastic, metal, or composite, these clips ensure smooth operation by keeping the window aligned within its frame. They are essential for maintaining proper functionality, especially in sliding, folding, or hinged window systems. Over time, clips may wear out, requiring replacement to prevent misalignment or operational issues. Their design varies depending on the window type, but their primary role remains consistent: to provide structural support and ensure seamless movement. They are often discreet and integral to the window’s overall performance.

1.2 Importance of Window Guide Clips

Window guide clips play a crucial role in ensuring the proper functioning and longevity of windows. They prevent wear and tear by maintaining alignment, allowing smooth opening and closing. This reduces strain on other components, enhancing durability. Guide clips also improve energy efficiency by ensuring a tighter seal, minimizing air leaks. Additionally, they contribute to safety by preventing accidental misalignment, which could lead to injuries or damage; Their presence ensures windows operate quietly and efficiently, making them an indispensable part of modern window systems. Without guide clips, windows would be more prone to operational issues, highlighting their essential role in maintaining functionality and performance;

1.3 Brief History of Window Guide Clips

Window guide clips have evolved alongside window design, with early versions appearing in ancient civilizations using rudimentary fasteners. In the Middle Ages, wooden pegs and metal brackets became common. The Industrial Revolution brought mass-produced metal clips, improving durability and functionality. Modern clips now use advanced materials like plastic and composites, offering better performance and versatility. Over time, their design has optimized for smooth operation, energy efficiency, and longevity. This evolution reflects technological advancements and changing architectural needs, making window guide clips indispensable in contemporary window systems.

Types of Window Guide Clips

Window guide clips come in various types, including sliding, folding, and hinged designs, each tailored to specific window styles and operational needs for optimal functionality.

2.1 Sliding Window Guide Clips

Sliding window guide clips are designed to facilitate smooth and effortless movement of sliding windows. These clips are typically attached to the window frame and the sash, ensuring proper alignment and preventing wear. They are made from durable materials like metal or plastic, offering long-lasting performance. Sliding clips are ideal for horizontal sliding windows, common in modern homes and commercial spaces. They minimize friction, reduce noise, and enhance the overall functionality of the window. Regular maintenance, such as cleaning and lubrication, helps maintain their efficiency. Sliding window guide clips are a practical solution for ensuring smooth operation and extending the lifespan of sliding windows.

2.2 Folding Window Guide Clips

Folding window guide clips are specialized components designed for folding windows, enabling smooth panel movement. Made from durable materials like metal or plastic, these clips ensure alignment and stability. They are crucial for maintaining the structural integrity of folding windows, allowing them to function effortlessly. The compact design of these clips makes them ideal for modern architectural styles, providing both functionality and aesthetics. Regular maintenance, such as cleaning and lubrication, helps extend their lifespan. Folding window guide clips are essential for ensuring the longevity and efficient operation of folding window systems, contributing to energy efficiency and user satisfaction.

2.3 Hinged Window Guide Clips

Hinged window guide clips are designed to support hinged windows, ensuring smooth operation and stability. These clips are typically made from durable materials like metal or plastic, offering resistance to wear and tear. They are essential for maintaining proper alignment and preventing sagging, especially in larger or heavier window frames. Hinged clips are often used in traditional window designs, where functionality and longevity are prioritized. Regular lubrication and inspection are recommended to maintain optimal performance. Their robust construction makes them ideal for both residential and commercial applications, providing reliable support and enhancing the overall efficiency of hinged window systems.

Materials Used for Window Guide Clips

Window guide clips are made from durable materials like plastic, metal, and composite, ensuring strength and longevity. Each material offers unique benefits, catering to different needs and preferences.

3.1 Plastic Window Guide Clips

Plastic window guide clips are a popular choice due to their durability and versatility. They are lightweight, corrosion-resistant, and suitable for both indoor and outdoor use. Plastic clips are often used in sliding windows and doors, providing smooth operation and minimizing wear on moving parts. They are resistant to weather conditions, moisture, and pests, making them ideal for various environments. Additionally, plastic clips are cost-effective and come in a range of styles and finishes to match different window designs. Their ease of installation and low maintenance requirements make them a practical option for homeowners and builders alike.

3.2 Metal Window Guide Clips

Metal window guide clips are highly durable and offer exceptional strength, making them ideal for heavy-duty applications. Commonly made from stainless steel or aluminum, these clips are resistant to rust and corrosion, ensuring long-lasting performance. They are often used in large or industrial windows where additional support is required. Metal clips provide a secure hold and minimize movement, reducing wear and tear on window mechanisms. While they are heavier and more expensive than plastic clips, their durability and reliability make them a preferred choice for commercial and residential settings where strength is a priority. They are also available in various finishes to suit different designs.

3.3 Composite Material Window Guide Clips

Composite material window guide clips combine the benefits of different materials, offering a balance of durability, flexibility, and aesthetic appeal. These clips are typically made from a mixture of plastics and fibers, providing enhanced strength without the weight of metal. They are resistant to weathering, moisture, and pests, making them ideal for outdoor and high-humidity environments. Composite clips are also less prone to fading and discoloration, ensuring they maintain their appearance over time. Their versatility allows them to be used in various window types, including sliding and hinged models. While slightly more expensive than plastic clips, their long lifespan and low maintenance requirements make them a cost-effective choice for many homeowners and builders.

Installation of Window Guide Clips

Installing window guide clips requires precise alignment and secure fastening to ensure smooth window operation. Proper tools and adherence to manufacturer instructions are essential for a successful installation.

4.1 Tools Required for Installation

Installing window guide clips requires a set of basic tools to ensure accuracy and security. A screwdriver is essential for tightening clips, while a drill may be needed for pre-drilling holes. Measuring tapes and levels help align clips properly. Pliers or wrenches can secure clips firmly. Safety gloves and goggles are recommended to protect against potential hazards. Additionally, spacers or shims may be necessary for proper positioning. Ensure all tools are compatible with the clip material to avoid damage. Having the right tools on hand simplifies the process and ensures a professional finish.

4.2 Step-by-Step Installation Process

Begin by preparing the window area, ensuring it is clean and free of debris. Measure and mark the positions for the clips using a level to ensure alignment. Drill pilot holes if necessary, then secure the clips with screws. Tighten firmly but avoid overtightening to prevent damage. Test the window’s movement to ensure smooth operation. Adjust clips if needed for proper alignment. Finally, inspect the installation to confirm stability and functionality. This systematic approach ensures a secure and efficient setup for window guide clips.

4.3 Common Mistakes to Avoid

When installing window guide clips, common mistakes include improper alignment, over-tightening screws, and using incorrect tools. Misalignment can lead to uneven window operation, while over-tightening may damage the clips or surrounding material. Additionally, using the wrong screw type or size can result in instability. Another mistake is not testing the window’s movement after installation, which can leave issues undetected. To avoid these errors, ensure precise measurements, use recommended tools, and follow manufacturer guidelines. Proper installation is crucial for optimal functionality and longevity of the window system.

Maintenance and Care of Window Guide Clips

Regular cleaning removes dirt and debris, ensuring smooth operation. Lubrication keeps clips functioning seamlessly. Inspect for wear and tear to address issues before they escalate, ensuring longevity and efficiency.

5.1 Cleaning Window Guide Clips

Cleaning window guide clips is crucial for maintaining their functionality. Use a soft cloth and mild soap solution to remove dirt and grime. Avoid harsh chemicals or abrasive materials that may damage the clips. Regular cleaning prevents dust buildup, which can cause friction and wear. For metal clips, a gentle polish can restore shine and protect against rust. Plastic clips can be wiped with a damp cloth. Ensure clips are dry after cleaning to prevent moisture-related issues. Cleaning should be done every 2-3 months, depending on usage and environmental conditions. Proper maintenance ensures smooth window operation and extends the lifespan of the clips.

5.2 Lubricating Window Guide Clips

Lubricating window guide clips is essential to ensure smooth operation and prevent wear. Use a silicone-based spray or grease, as these are ideal for moving parts. Apply a small amount to the contact points, avoiding over-lubrication, which can attract dust. Metal clips benefit most from lubrication, while plastic clips may not require it as frequently. Lubricate every 6-12 months, depending on usage. Avoid oil-based products, as they can degrade certain materials. Proper lubrication reduces friction, prevents squeaking, and extends the lifespan of the clips. Always clean the clips before applying lubricant for optimal results.

5.3 Inspecting for Wear and Tear

Regularly inspecting window guide clips for wear and tear ensures optimal performance and prevents potential issues. Check for visible signs of damage, such as cracks or dents, and look for excessive play or misalignment; Over time, clips can become loose or worn, especially if exposed to harsh weather conditions. Inspect both the clips and their mounting points for rust or corrosion, particularly on metal clips. If damage is detected, replace the affected parts promptly to maintain window functionality. Use a magnifying glass for a detailed examination and test the windows’ operation to ensure smooth movement. Early detection of wear ensures longevity and prevents costly repairs.

Common Issues with Window Guide Clips

Common issues include wear and tear, misalignment, and damage from extreme weather, which can affect the functionality and durability of window guide clips over time.

6.1 Wear and Tear Over Time

Window guide clips often experience wear and tear due to frequent use, leading to reduced functionality. Over time, friction and repeated movement can cause clips to degrade, especially in high-traffic areas. Environmental factors like humidity and temperature fluctuations may exacerbate this deterioration. If left unaddressed, worn-out clips can result in misaligned windows and difficulty in opening or closing them. Regular maintenance, such as cleaning and lubricating, can help mitigate this issue. However, excessive wear may require replacement to restore smooth operation. Addressing wear promptly ensures windows remain functional and energy-efficient, preventing further damage to the window system.

6.2 Misalignment of Clips

Misalignment of window guide clips is a common issue that can disrupt smooth window operation. Clips may become misaligned due to improper installation, frequent use, or accidental bumps. When misaligned, windows may not open or close properly, leading to air leaks and reduced energy efficiency. In severe cases, misalignment can cause damage to the window frame or surrounding structure. To fix this, clips may need to be adjusted or replaced. Regular inspections and maintenance can help prevent misalignment, ensuring windows function as intended. Proper alignment is crucial for both functionality and the longevity of the window system.

6.3 Damage from Extreme Weather

Extreme weather conditions can significantly impact window guide clips, causing damage and reducing their effectiveness. Intense sunlight may degrade plastic clips, while heavy rain or hail can corrode metal components. Freezing temperatures can make materials brittle, leading to cracking or breaking. High winds may also exert additional stress on clips, especially if windows are opened during storms. Coastal areas face the added threat of saltwater exposure, accelerating rust and corrosion. Regular inspections and using weather-resistant materials can help mitigate these issues. Addressing weather-related damage promptly ensures the longevity and functionality of window guide clips, maintaining the overall integrity of the window system.

Replacement of Window Guide Clips

Replacement of window guide clips is necessary when they show significant wear or damage. Remove old clips, clean the area, and install new ones securely. Ensure compatibility and proper alignment for smooth window operation. If unsure, consult a professional for assistance.

7.1 When to Replace Window Guide Clips

Window guide clips should be replaced when they show visible signs of wear, such as cracks, breaks, or excessive friction. If the clips are misaligned, causing windows to stick or close improperly, replacement is necessary. Additionally, if the clips are damaged by extreme weather, moisture, or heavy use, they should be replaced promptly. Failing to do so can lead to further damage to the window frame or glass. Always inspect the clips regularly and replace them when functionality is compromised to ensure smooth window operation and prevent potential safety hazards.

7.2 How to Replace Window Guide Clips

To replace window guide clips, start by removing the old or damaged clips using a screwdriver or utility knife. Gently pry them away from the window frame. Clean the area to ensure proper adhesion or fit for the new clips. Align the new clips with the guide rails and secure them using screws or adhesive, depending on the type. Ensure they are tightly fastened to maintain window stability. Test the window’s movement to confirm smooth operation. If unsure, consult a professional for assistance. Proper installation ensures longevity and functionality of the window system.

7.3 Choosing the Right Replacement Clips

Choosing the right replacement clips involves considering factors like material, compatibility, and durability. Ensure the clips match your window type and size for proper fit. Plastic clips are lightweight and cost-effective, while metal clips offer superior strength. Composite materials blend durability and aesthetics. Check the brand’s reputation and reviews for reliability. Measure the existing clips or consult the manufacturer’s guide to avoid sizing errors. Aesthetic appeal should also align with your window’s design. Prioritize clips with a rust-resistant coating if exposed to moisture. Selecting the correct replacement ensures optimal performance and extends the lifespan of your windows. Proper fit and quality are essential for smooth operation.

Factors to Consider When Selecting Window Guide Clips

When selecting window guide clips, consider durability, compatibility with window type, and aesthetic appeal to ensure functionality and visual harmony with your home’s design and material.

8.1 Durability and Longevity

Durability and longevity are critical when choosing window guide clips. High-quality materials like metal or composite ensure resistance to wear and tear, while plastic may degrade faster. Exposure to extreme weather can affect longevity, so selecting weather-resistant clips is essential. Regular maintenance, such as lubrication, can extend their lifespan. Opting for durable clips minimizes the need for frequent replacements, ensuring smooth window operation over time. Checking product reviews and manufacturer warranties can help identify long-lasting options. Prioritizing durability ensures your window system remains efficient and reliable for years to come, reducing maintenance costs and enhancing overall performance.

8.2 Compatibility with Window Type

Compatibility with your window type is vital for proper functionality. Ensure clips match your window’s specific design, whether it’s sliding, folding, or hinged. Different mechanisms require tailored solutions. For example, sliding windows need clips that securely guide the sash without obstructing movement, while folding windows may require clips that allow smooth pivoting. Choosing the wrong type can lead to poor performance or damage. Always verify compatibility with your window’s manufacturer specifications to ensure a perfect fit and optimal performance. This step is crucial for maintaining the longevity and efficiency of your window system.

8.3 Aesthetic Appeal

Aesthetic appeal plays a significant role in choosing window guide clips, as they can enhance or detract from a window’s overall appearance. Clips come in various materials and finishes, such as sleek metal tones or subtle plastic designs, allowing them to blend seamlessly with different interior styles. Modern designs often prioritize minimalism, with low-profile clips that maintain functionality without compromising visual appeal. Additionally, some clips are customizable in color or texture to match specific decor themes. Selecting clips that complement your window’s style ensures a cohesive and polished look, making them a practical yet stylish addition to your home’s design.

FAQs About Window Guide Clips

  • How are window guide clips installed?
  • Can window guide clips be maintained at home?
  • When should window guide clips be replaced?
  • Are all window guide clips compatible with any window type?

9.1 Can I Install Window Guide Clips Myself?

Yes, installing window guide clips can be done yourself with basic tools and knowledge. Ensure you have a screwdriver, clips, and alignment tools. Start by removing the old clips carefully to avoid damaging the window frame. Clean the area to ensure proper adhesion or fitting. Align the new clips according to the manufacturer’s instructions and secure them firmly. If unsure, consult a DIY guide or professional for assistance. Proper installation ensures smooth window operation and prevents future issues.

9.2 How Often Should I Maintain My Window Guide Clips?

Regular maintenance of window guide clips is essential to ensure smooth window operation. It is recommended to inspect and clean the clips every three to six months. During this process, remove any dirt or debris that may have accumulated, as it can hinder the functionality of the clips. Additionally, lubricating the clips with a silicone-based spray can help maintain their mobility and prevent wear. If you notice any signs of wear or damage, such as difficulty in opening or closing the window, consider replacing the clips promptly. Proper maintenance can extend the lifespan of the window guide clips and ensure optimal performance.

9.3 Are All Window Guide Clips the Same?

No, not all window guide clips are the same. They vary in design, material, and functionality based on the type of window and its operational needs. For instance, sliding windows may use different clips compared to folding or hinged windows. Additionally, materials like plastic, metal, or composite can affect their durability and compatibility. While some clips are designed for heavy-duty use, others may prioritize aesthetics or noise reduction. It is important to choose clips that match your window type and requirements for optimal performance. Always consult the manufacturer’s specifications to ensure the right fit and functionality for your windows.

Window guide clips are crucial for smooth window operation, offering durability and functionality. Proper installation, maintenance, and timely replacement ensure optimal performance, enhancing overall window efficiency and longevity significantly.

10.1 Summary of Key Points

Window guide clips are essential for ensuring smooth window operation, durability, and alignment. They come in various types, such as sliding, folding, and hinged, catering to different window systems. Made from materials like plastic, metal, or composites, they offer versatility and strength. Proper installation requires specific tools and careful steps to avoid common mistakes. Regular maintenance, including cleaning and lubrication, is crucial for longevity. Issues like wear and tear, misalignment, or weather damage may arise, necessitating timely replacement. Selecting the right clips involves considering durability, compatibility, and aesthetics. Understanding these aspects ensures optimal functionality and extends the lifespan of window systems.

10.2 Final Thoughts on Window Guide Clips

Window guide clips are indispensable for ensuring smooth, efficient, and long-lasting window functionality. By guiding sashes and maintaining alignment, they prevent wear and tear, enhancing overall performance. Their durability and versatility make them a vital component for any window system. Regular maintenance and proper installation are key to maximizing their benefits. With various types and materials available, selecting the right clips tailored to specific needs is essential. Investing in high-quality window guide clips not only improves functionality but also adds to the aesthetic appeal of windows. Their role in maintaining structural integrity and user convenience underscores their importance in modern and traditional window designs alike.

ted baker size guide womens

Ted Baker offers stylish, high-quality womenswear with a focus on meticulous attention to detail. Their size guide ensures a perfect fit, catering to diverse body measurements.

Overview of Ted Baker as a Brand

Ted Baker is a British lifestyle brand renowned for its high-quality, quirky, and sophisticated designs. Founded in Glasgow in 1988 as a menswear label, the brand has expanded to include womenswear, accessories, and footwear. Known for its meticulous attention to detail and unique aesthetic, Ted Baker blends classic British heritage with modern twists. The brand emphasizes quality, comfort, and timeless style, offering a wide range of collections, including Global, Endurance, and Pashion. With a global presence, Ted Baker has become a favorite for fashion-conscious individuals seeking effortlessly elegant designs. Their commitment to inclusivity and precision sizing ensures a perfect fit for every customer.

Importance of Sizing in Womenswear

Accurate sizing is crucial in womenswear to ensure comfort and confidence. Proper fit enhances the way clothing drapes on the body, creating a flattering silhouette. Ted Baker’s size guide provides precise measurements, helping women choose garments that fit their unique proportions. Ill-fitting clothes can lead to discomfort and a less polished appearance, while the right size ensures optimal wearability. By understanding body measurements, customers can make informed purchases, avoiding the hassle of returns and exchanges. Ted Baker’s commitment to sizing accuracy reflects its dedication to delivering exceptional style and comfort, ensuring every woman feels her best in their designs.

Ted Baker Womens Size Guide

Ted Baker’s womens size guide offers a comprehensive fit solution, ensuring accuracy and comfort. It includes detailed body measurements and international size conversions for a perfect match.

Understanding Ted Baker Size Chart

Ted Baker’s size chart provides a clear correlation between their sizes and standard UK, US, EU, and AU measurements. Each Ted Size corresponds to specific body measurements, ensuring accuracy. For example, Ted Size 0 aligns with UK 6, while Ted Size 6 corresponds to UK 18. The chart includes detailed bust, waist, and hip measurements, allowing customers to determine their best fit. International conversions are also available, making it accessible for global shoppers. This comprehensive guide helps women choose the right size effortlessly, ensuring comfort and style. By referencing the chart, customers can make informed purchasing decisions, aligning with Ted Baker’s commitment to quality and fit.

Key Measurements: Bust, Waist, and Hips

The Ted Baker size guide emphasizes the importance of accurate body measurements for the best fit. The bust measurement is taken around the fullest part of the chest, ensuring comfort and proper sizing. The waist is measured at its natural narrowest point, often found by bending slightly to one side. Hip measurements are recorded around the widest part of the hips, typically 7-9 inches below the waistline. These three measurements are crucial for determining the correct Ted Size, as they align with the brand’s tailored fit philosophy. By focusing on these key areas, Ted Baker ensures that every garment flatters and fits perfectly, regardless of size or style.

Size Conversion: UK, US, EU, and AU

Ted Baker’s size guide provides a comprehensive conversion chart for international sizing, ensuring a seamless shopping experience. UK sizes range from 6 to 18, corresponding to Ted Baker sizes 0 to 6. US sizes align as follows: Ted Size 0 equates to US 2, increasing incrementally to Ted Size 6 as US 14. EU sizes mirror UK measurements, with Ted Size 0 being EU 34 and Ted Size 6 as EU 44. Australian sizes follow a similar pattern, with Ted Size 0 corresponding to AU 6 and Ted Size 6 to AU 16. This detailed conversion system allows customers worldwide to find their perfect fit effortlessly, regardless of their location or preferred sizing standard.

How to Measure for the Best Fit

Measure your bust at the fullest point, keeping the tape horizontal. For your waist, measure the narrowest part, and for your hips, measure around the widest point, about 7-9 inches below your waistline.

Measuring Your Bust

To ensure the best fit, measure your bust by wrapping a flexible tape measure around the fullest part of your chest. Keep the tape level and parallel to the floor. Make sure it’s not too tight or too loose. The measurement should reflect your natural bust size without any compression. This step is crucial for selecting the correct Ted Baker size, as their sizing is based on specific body measurements. For accuracy, stand up straight and avoid slouching. If you’re wearing a bra, ensure it’s not adding bulk or altering your natural shape. Proper bust measurement is key to finding a flattering fit in Ted Baker womenswear.

Measuring Your Waist

To measure your waist accurately, locate the narrowest point, typically just above your belly button. Stand straight and wrap a flexible tape measure around this area. Ensure the tape is level and parallel to the floor. Do not pull it too tight or leave it too loose. Ted Baker’s sizing guide emphasizes the importance of natural posture for accurate measurements. Bend slightly to one side if needed to identify your natural waistline. This measurement is essential for determining your Ted Baker size, as their garments are designed to fit closely around the waist. Proper alignment ensures a flattering and comfortable fit in their womenswear collection.

Measuring Your Hips

To accurately measure your hips for Ted Baker womenswear, stand with your feet together and wrap a flexible tape measure around the fullest part of your hips. This typically includes your buttocks and is usually about 7-9 inches (18-23 cm) below your natural waistline. Ensure the tape measure is level and parallel to the floor. Do not pull it too tight or leave it too loose. Ted Baker’s sizing guide recommends maintaining a natural posture for precise measurements. This ensures a flattering fit, as their garments are designed to complement the curves of your body. Accurate hip measurements are crucial for selecting the correct size in Ted Baker’s womenswear collection.

Ted Baker Womens Clothing Size Chart

Ted Baker’s womenswear size chart offers a detailed correlation of Ted sizes (0-6) with UK sizes (6-18), EU sizes (34-44), and body measurements for precise fit guidance.

Size Correlation: Ted Size vs. UK Size

Ted Baker womenswear sizes are thoughtfully designed to align with UK sizing standards, ensuring a consistent fit. The Ted Size 0 corresponds to a UK size 6, while Ted Size 1 matches a UK size 8, continuing up to Ted Size 6, which equates to a UK size 18. This straightforward correlation allows customers to easily identify their size, regardless of the collection. Each Ted Size is carefully calibrated to reflect standard UK measurements, providing a reliable guide for shoppers. This sizing system ensures that every garment offers a flattering and comfortable fit, catering to a wide range of body types and preferences. By aligning Ted Sizes with familiar UK sizes, the brand simplifies the shopping experience for its customers worldwide.

Body Measurements by Ted Size

Ted Baker provides detailed body measurements for each size to ensure the best fit. For example, Ted Size 0 corresponds to a bust of 79cm, waist of 63.5cm, and hips of 88cm, while Ted Size 6 measures 104cm in bust, 86.5cm in waist, and 113cm in hips. These measurements are carefully calibrated to reflect standard UK sizing, offering a reliable guide for shoppers. By referencing these specific dimensions, customers can determine their ideal Ted Size based on their personal measurements. This approach ensures that each garment fits comfortably and flattering, catering to a wide range of body types. Understanding these measurements helps in making informed purchasing decisions and achieving the perfect fit.

International Size Comparisons

Ted Baker’s size guide offers a seamless conversion across international standards, ensuring a consistent fit worldwide. For instance, a Ted Size 0 corresponds to UK 6, US 2, EU 34, and AU 6, while a Ted Size 6 aligns with UK 18, US 14, EU 44, and AU 18. This detailed comparison allows customers to easily identify their size across different regions. By aligning Ted Sizes with global sizing standards, the brand simplifies shopping for international customers. This universal approach ensures that whether you’re in the UK, US, Europe, or Australia, you can confidently select your correct size. This comprehensive sizing system enhances the shopping experience, making it accessible and stress-free for women globally.

Ted Baker Womens Swimwear Size Guide

Ted Baker offers swimwear sizes from XXS to XXL, with Ted Sizes 0-6 corresponding to UK 6-18, US 2-14, and EU 32-44, ensuring a perfect fit.

Beachwear and Swimwear Sizing

Ted Baker swimwear and beachwear sizing ranges from XXS to XXL, corresponding to Ted Sizes 0-6, which align with UK sizes 6-18, US 2-14, and EU 32-44. The sizing ensures a comfortable and supportive fit, with measurements tailored to match your body proportions. For accurate sizing, refer to the guide’s detailed measurements for bust, waist, and hips. Ted Baker’s swimwear is designed to flatter various body types, offering a range of styles from bikinis to one-pieces. By using the size chart, you can easily find your perfect fit and enjoy confidence-boosting beachwear. The guide also provides clear conversion options for international sizes, making it accessible for global customers to shop seamlessly.

Size Conversion for Swimwear

Ted Baker swimwear sizing offers a global approach with clear conversions. Ted Size 0 corresponds to UK XXS, US 2, EU 32, and AU 6, while Ted Size 6 aligns with UK XXL, US 14, EU 44, and AU 18. This consistency ensures ease of shopping across regions. The swimwear size guide provides detailed measurements for bust, waist, and hips, allowing for accurate fits. Whether shopping in the UK, US, EU, or Australia, the size chart ensures a seamless experience. Use the conversion table to match your local size with Ted Baker’s sizing system, ensuring confidence and comfort in your swimwear choice.

Ted Baker Womens Footwear Size Guide

Ted Baker’s womens footwear size guide offers a global fit, with conversions across UK, US, EU, and Japan sizes. Ensure perfect fit by measuring feet in the afternoon for accuracy.

Shoe Size Conversion: UK, US, EU, and Japan

Ted Baker’s footwear size guide provides seamless conversion across UK, US, EU, and Japan sizes. For example, a Ted Size 3 corresponds to UK 5, US 7, EU 35, and Japan 21.5. This ensures a consistent fit globally. When converting, consider measuring your feet in the afternoon for accuracy, as feet tend to swell slightly during the day. Proper measurement and conversion are key to finding your ideal shoe size. Use Ted Baker’s detailed chart to match your foot length to the correct size, ensuring comfort and style in every step. This guide helps you navigate sizing differences effortlessly, making your shopping experience smoother.

How to Choose the Right Shoe Size

Choosing the right shoe size ensures comfort and style. Ted Baker’s footwear guide recommends measuring your feet in the afternoon, as they tend to swell slightly during the day. Use a ruler or a Brannock device to measure the length of your foot in centimeters or inches. Compare this measurement to Ted Baker’s size chart, which provides precise conversions across UK, US, EU, and Japan sizes. When trying on shoes, wear the same thickness of socks you intend to use for the best fit. If you’re between sizes, opt for the larger size to avoid tightness. Ted Baker’s size guide helps you find your perfect match, ensuring shoes that are both comfortable and stylish for all occasions.

Tips for Ensuring the Best Fit

Know your measurements, use Ted Baker’s size guide, and consider fabric stretch. Check fit guides for specific styles to ensure comfort and confidence in your choice.

Understanding Ted Baker’s Fit Philosophy

Ted Baker’s fit philosophy revolves around creating clothing that combines tailored precision with a relaxed, comfortable feel. The brand emphasizes quality fabrics and attention to detail, ensuring garments flatter various body types. Designed to offer a balanced fit, Ted Baker’s womenswear caters to diverse shapes while maintaining a sophisticated, feminine aesthetic. The sizing is crafted to align with real-world measurements, providing a confidence-boosting fit. By blending classic British style with modern sensibilities, Ted Baker ensures its collections are both versatile and timeless. This approach reflects the brand’s commitment to helping women feel empowered and stylish in every occasion.

How to Use the Size Guide Effectively

To use Ted Baker’s size guide effectively, start by measuring your bust, waist, and hips accurately. Compare these measurements to the size chart to find your best fit. Pay attention to the numerical values provided for each Ted Baker size, ensuring alignment with your body dimensions. Consider the fabric type and style of the garment, as some may offer stretch or a relaxed fit. Use the size conversion chart for international sizing if needed. Double-checking your measurements ensures a flattering fit. Ted Baker’s size guide is designed to simplify your shopping experience, helping you select garments that enhance your silhouette and provide comfort. This approach ensures a seamless and satisfying purchase.

Return and Exchange Policies

Ted Baker offers a 14-day return policy for refunds and 28 days for exchanges. Items must be in original condition with tags attached for a valid return or exchange.

What if Your Size Doesn’t Fit?

If your Ted Baker item doesn’t fit perfectly, you can return or exchange it within 14 days for a refund or 28 days for an exchange. Items must be in their original condition with all tags attached. Ted Baker’s size guide is designed to help you choose the right size, but if adjustments are needed, their flexible return policy ensures a hassle-free experience. To initiate a return or exchange, visit their website or contact customer service for assistance. This policy allows you to shop confidently, knowing you can find the perfect fit without stress.

Ted Baker’s Return and Exchange Process

Ted Baker’s return and exchange process is straightforward and customer-friendly. To initiate a return, simply visit their website and complete the online returns form within 14 days of delivery. Items must be unworn, undamaged, and in their original packaging with tags intact. Once processed, refunds are issued to the original payment method within 10-14 business days. For exchanges, follow the same steps and select your desired size or style; Shipping labels are provided for convenience. This seamless process ensures that finding your perfect fit is stress-free, with clear guidelines to assist you every step of the way.

Frequently Asked Questions

Commonly asked questions include inquiries about size accuracy, return policies, and fit tips. These questions help ensure the best shopping experience with Ted Baker womenswear.

Common Questions About Sizing

Customers often ask about the accuracy of Ted Baker’s size chart and how it compares to other brands. They also inquire about the best way to measure themselves for a perfect fit and whether the sizing runs true to their expectations. Additionally, questions about international size conversions are frequent, particularly for those shopping from outside the UK. Some customers also seek advice on choosing the right size for specific body types or styles, such as swimwear or tailored dresses. These questions highlight the importance of using the size guide effectively to ensure satisfaction with their purchases.

Additional Tips for Shopping Ted Baker

When shopping Ted Baker womenswear, consider their fit guide for tailored styles. Check their loyalty program for exclusive benefits. Shop during sales for discounts on popular items. Care for garments according to instructions to maintain quality and fit. Explore their accessories to complete outfits. Sign up for newsletters for early access to new collections. Visit physical stores for personalized styling advice. Use their size chart to avoid multiple exchanges. Follow their social media for styling inspiration. Consider their sustainable collections for eco-friendly choices. Finally, review their return policy to ensure a smooth shopping experience.

women’s lacrosse field diagram pdf

Women’s lacrosse field diagrams provide a visual guide for understanding the game’s setup, featuring standard dimensions and key markings. Available as PDFs from USA Lacrosse, these diagrams help players and coaches visualize the field layout, aiding in strategic planning and rule comprehension;

1.1 Importance of Field Diagrams in Women’s Lacrosse

Field diagrams are essential for understanding women’s lacrosse, aiding coaches and players in visualizing gameplay strategies. They provide clarity on field markings, dimensions, and penalty zones, ensuring compliance with rules. Diagrams also help in training, allowing teams to practice drills and formations effectively. USA Lacrosse offers downloadable PDFs, making it easier to access and print these resources for better preparation and execution of the game. Proper field setup ensures fair and safe play.

1.2 Overview of the Women’s Lacrosse Field Layout

The women’s lacrosse field is a rectangular area measuring 110 yards in length and 60 yards in width. Key features include the centerline, goal circles, 8-meter arc, and penalty zones. The field layout ensures balanced gameplay, with markings guiding player positions and movement. PDF diagrams from USA Lacrosse provide detailed visuals, helping coaches and players understand the field’s structure and rules, ensuring accurate setup and compliance with official standards for optimal play.

Women’s Lacrosse Field Dimensions

A standard women’s lacrosse field measures 110 yards in length and 60 yards in width, ensuring consistent gameplay across collegiate and professional levels with ample space for fast-paced action and strategic maneuvering.

2.1 Standard Field Size (110 yards x 60 yards)

The standard women’s lacrosse field measures 110 yards in length and 60 yards in width, providing a rectangular playing area. This size is consistent across collegiate and professional levels, ensuring uniformity in gameplay. The field’s dimensions accommodate fast-paced action and strategic maneuvering, with ample space for players to move freely. This size is widely recognized and used in official competitions, making it a benchmark for field setup and diagram creation. PDF diagrams from USA Lacrosse also reflect these dimensions for accurate field layouts.

2.2 Metric Conversions for International Play

For international competitions, the standard women’s lacrosse field is converted to metric measurements, with the length approximately 100.58 meters and the width about 54.86 meters. Key markings, such as the 8-meter arc, are also converted to 8.58 meters. These conversions ensure consistency in global play, adhering to FIL standards. PDF diagrams from USA Lacrosse often include metric equivalents, aiding international teams in field setup and understanding game dimensions accurately.

2.3 Variations in Field Dimensions for Youth and Amateur Games

Youth and amateur women’s lacrosse fields often have smaller dimensions to accommodate skill levels and safety. Fields for 10U players may be reduced to 90-100 yards in length and 60-70 yards in width. PDF diagrams from USA Lacrosse offer adjustable templates, ensuring fields suit younger players’ needs while maintaining gameplay integrity. These variations promote development and accessibility, aligning with age-specific rules to foster growth in the sport.

Key Markings on the Women’s Lacrosse Field

Key markings include the goal area, 8-meter arc, restraining line, and fan shape, essential for gameplay and strategy.

3.1 Goal Area and Fan Shape

The goal area in women’s lacrosse is marked by an 8.5-foot-wide crease, with a semicircular fan shape extending 5 yards from the goal line. This fan shape is crucial for free-position shots and helps maintain player positioning during scoring opportunities. Accurate markings ensure fair play and clarity for referees and players alike, as outlined in official diagrams available as downloadable PDFs from organizations like USA Lacrosse.

3.2 8-Meter Arc and Other Penalty Zones

The 8-meter arc, marked in women’s lacrosse, designates the area where free-position shots are taken. This arc, along with other penalty zones, ensures safe distances during play. Official diagrams highlight these areas, aiding referees in enforcing rules and maintaining player safety. Downloadable PDFs from USA Lacrosse provide clear visuals, helping teams understand these critical zones and their roles in gameplay.

3.4 Restraining Line and Player Positions

The restraining line divides the field, limiting defensive players to specific areas. Women’s lacrosse diagrams clearly mark this line, ensuring players understand their positioning. PDF guides from USA Lacrosse detail these markings, helping coaches and athletes comply with rules and optimize team strategies during games.

How to Read a Women’s Lacrosse Field Diagram

Understanding field labels and markings is essential for interpreting women’s lacrosse diagrams. PDF guides detail the 110m x 60m playing area, highlighting key zones and lines for clarity and strategy.

4.1 Understanding Field Labels and Markings

Field labels and markings are crucial for interpreting women’s lacrosse diagrams. The PDF guides include labels for the goal circle, 8-meter arc, and restraining line. These markings define zones like the fan-shaped goal area and penalty regions. The centerline divides the field, while hash marks and sidelines outline boundaries. Understanding these labels ensures proper field setup and gameplay adherence. Diagrams also highlight distances and measurements, aiding in accurate rule application and strategic planning for players and coaches.

4.2 Interpreting the 110m x 60m Playing Area

The 110m x 60m playing area is the standard size for women’s lacrosse, as detailed in downloadable PDF diagrams. The length accommodates fast-paced gameplay, while the width allows for strategic positioning. The field is divided by a centerline, with goal circles at each end. Markings include the 8-meter arc, penalty zones, and restraining lines, which guide player movements and define scoring opportunities. Understanding this layout is essential for visualizing plays and adhering to game rules, as outlined in official field diagrams.

4.3 Role of the Centerline in Gameplay

The centerline divides the 110m x 60m field into two equal halves, serving as a critical reference point for players and officials. It marks the midpoint for draw controls and restarts play after goals. The centerline also helps identify areas for defensive and offensive strategies, ensuring fair play and maintaining game flow. Field diagrams highlight this line, emphasizing its role in structuring gameplay and maintaining order in women’s lacrosse, as outlined in official PDF guides.

Differences Between Women’s and Men’s Lacrosse Fields

Women’s lacrosse fields are smaller, with specific markings like the 8-meter arc, while men’s fields have larger dimensions and additional penalty zones, as shown in PDF diagrams.

5.1 Field Size and Markings

Women’s lacrosse fields are 110 yards long and 60 yards wide, while men’s fields are 110 yards by 70 yards. Key differences include the 8-meter arc and penalty zones in women’s fields, which are absent in men’s. Men’s fields feature face-off areas and larger goal circles. Markings like the restraining line vary, with women’s at 30 meters and men’s at 35 meters. These differences are clearly outlined in womens lacrosse field diagram PDFs, ensuring clarity for players and officials.

5.2 Goal Area Dimensions

The goal area in women’s lacrosse is 8 meters wide, marked by a fan shape extending from the goal line. The goal itself measures 7 feet wide and 7 feet high, slightly larger than in men’s lacrosse. Penalty arcs and circles are positioned 12 meters from the goal. These dimensions are clearly illustrated in womens lacrosse field diagram PDFs, ensuring accurate setup and compliance with official regulations for both practice and competition.

5.3 Restraining Line Variations

The restraining line in women’s lacrosse is positioned 25 meters from the goal, unlike the 23-meter distance in men’s lacrosse. This variation affects gameplay dynamics, particularly free-position shots. Diagrams in womens lacrosse field diagram PDFs illustrate these differences, ensuring proper field setup. The restraining line’s placement is crucial for maintaining fair play and strategic positioning, as outlined in official regulations and visual guides.

Unified Field Diagrams for Boys and Girls

Unified field diagrams are designed for both boys and girls, offering consistency in gameplay and training. These diagrams are available as downloadable PDFs, ensuring adaptability for youth lacrosse programs.

6.1 Dimensions and Markings for Unified Fields

Unified fields for boys and girls measure 110 yards by 60 yards, aligning with standard women’s lacrosse dimensions. Markings include the 8-meter arc, goal circles, and restraining lines, ensuring consistency for both genders. These diagrams are available as downloadable PDFs, providing clear visual guides for setup and gameplay. The unified field setup promotes equality and simplifies training for youth programs, making it easier for coaches to teach fundamental skills across all players.

6.2 How Unified Fields Differ from Women’s Fields

Unified fields maintain the same 110×60-yard dimensions as women’s fields but incorporate markings for both genders. They include the women’s 8-meter arc and the boys’ 10-yard arc, ensuring adaptability. Additionally, the restraining line is positioned at 25 meters for girls and 35 yards for boys, accommodating rule differences. These modifications allow seamless transitions between games while preserving the core layout, making unified fields versatile for mixed training and competition environments.

6.3 Importance of Unified Fields in Youth Lacrosse

Unified fields are essential for youth lacrosse as they provide a versatile space for both boys’ and girls’ play. These fields accommodate varying skill levels and age groups, fostering inclusivity. By combining markings for both genders, they simplify training and competition logistics. Unified fields also promote skill development and adaptability, ensuring young athletes can transition seamlessly between formats. This cost-effective solution supports program growth, making lacrosse more accessible and engaging for youth participants.

Resources for Downloading Women’s Lacrosse Field Diagrams

USA Lacrosse offers free women’s lacrosse field diagrams in PDF format, featuring 8.5 x 11 layouts. These resources include full and half-field diagrams with notes areas for coaching and planning purposes.

7.1 Free PDF Downloads from USA Lacrosse

USA Lacrosse provides complimentary women’s lacrosse field diagrams in PDF format. These downloadable resources include 8.5 x 11 layouts, with Page 1 featuring two full fields and a notes area, while Page 2 offers four half-fields for detailed planning. Coaches and players can utilize these diagrams to strategize and understand field markings effectively, ensuring accurate setup and gameplay preparation. These PDFs are readily accessible online, supporting lacrosse development at all levels.

7.2 Printable Diagrams for Coaches and Players

Coaches and players can access printable women’s lacrosse field diagrams designed for easy use. These PDFs offer clear visuals of field layouts, including markings like the 8-meter arc and goal area. Printable diagrams are ideal for practice planning, strategy sessions, and educating newcomers. Their simplicity and portability make them essential tools for enhancing teamwork and understanding of the game’s structure, ensuring everyone is on the same page during training and competition.

7.3 Websites Offering Customizable Field Diagrams

Several websites provide customizable women’s lacrosse field diagrams, allowing users to tailor layouts to specific needs. USA Lacrosse and other platforms offer editable PDFs and tools for adjusting dimensions, markings, and labels. These resources are invaluable for coaches and players seeking to visualize strategies or adapt fields for training drills, ensuring flexibility and precision in preparation for games and practices.

Evolution of Women’s Lacrosse Field Standards

Women’s lacrosse field standards have evolved over time, with historical changes in dimensions and markings reflecting the sport’s growth and international competition demands.

8.1 Historical Changes in Field Dimensions

Historically, women’s lacrosse field dimensions have undergone adjustments to enhance gameplay and safety. Originally varying in size, fields were standardized to 110 yards by 60 yards for consistency across levels. Early modifications included refining penalty zones and goal areas, while metric conversions facilitated international play. These changes ensure uniformity, improving both player experience and competitive balance, reflecting the sport’s growth and modernization to meet evolving standards and player needs.

8.2 Modernization of Field Markings

Modern women’s lacrosse field markings emphasize clarity and safety, with standardized dimensions and precise labels. Updates include the 8-meter arc, penalty zones, and restraining lines, ensuring consistent gameplay. Metric conversions and unified field diagrams cater to international play, while digital tools like PDFs provide accessible resources for coaches and players. These advancements enhance strategic planning, improve rule enforcement, and align with the sport’s global growth, ensuring a balanced and fair competitive environment for all participants.

8.3 Impact of International Competition on Field Standards

International competition has driven the standardization of women’s lacrosse field dimensions and markings, ensuring consistency across global games. The adoption of unified field diagrams, such as the 110m x 60m layout, facilitates fair play and clarity for all participants. Metric conversions and precise markings, like the 8-meter arc, are now widely implemented, reflecting the sport’s growth and the need for uniformity in rules and field setups worldwide, as documented in official PDF resources from governing bodies like USA Lacrosse.

Women’s lacrosse field diagrams are essential for game clarity, strategic planning, and rule compliance, ensuring players and coaches understand the field layout effectively.

9.1 Summary of Key Points

Women’s lacrosse field diagrams are crucial for understanding the game’s layout, featuring standard dimensions, key markings, and variations for youth play. PDF resources from organizations like USA Lacrosse provide detailed visuals, ensuring clarity for players, coaches, and officials. These diagrams highlight essential elements such as the 110×60-yard field, goal areas, penalty zones, and restraining lines, aiding in strategic planning and rule compliance. They serve as invaluable tools for mastering the sport’s fundamentals and nuances.

9.2 Final Thoughts on the Importance of Field Diagrams

Field diagrams are indispensable for understanding women’s lacrosse, offering clear visuals of the game’s structure and rules. They enable players, coaches, and officials to grasp key elements like markings, positions, and penalties. By standardizing the field layout, diagrams ensure consistency across all levels, fostering fair play and skill development. Their availability in PDF formats makes them accessible tools for learning and referencing, essential for both newcomers and experienced participants in the sport.

References and Further Reading

Official resources from USA Lacrosse and NCAA provide detailed field diagrams and guidelines. Downloadable PDFs offer comprehensive visuals and instructions for coaches, players, and officials.

10.1 Official Lacrosse Organizations and Websites

USA Lacrosse and the NCAA are primary sources for official field diagrams and guidelines. Their websites offer downloadable PDFs, including detailed womens lacrosse field layouts and measurement standards. Additionally, organizations like the Federation of International Lacrosse (FIL) provide resources for global competitions. These official platforms ensure consistency and accuracy in field setups, making them essential references for coaches, players, and officials seeking reliable information on womens lacrosse field diagrams.

10.2 Recommended Resources for Coaches and Players

Coaches and players can benefit from downloadable PDF diagrams offered by USA Lacrosse and the NCAA. Websites like PioneerAthletics.com and USSCproducts.com provide detailed field layouts and measurement guides. These resources include visual aids for understanding key markings, such as the 8-meter arc and goal area. Additionally, instructional guides from organizations like Ontario Womens Field Lacrosse offer tips for setting up practice drills and game strategies, making them invaluable tools for training and competition preparation.

criminal justice in action 11th edition pdf free

This edition provides a comprehensive overview of the criminal justice system, offering insights into its structure, functions, and ethical considerations. It is designed for both students and professionals, blending theoretical knowledge with practical applications to enhance understanding of the field. The 11th edition incorporates updated content, real-world examples, and innovative learning tools to ensure a dynamic and engaging educational experience.

1.1 Overview of the Book

Criminal Justice in Action, 11th Edition, authored by Larry K. Gaines and Roger LeRoy Miller, is a comprehensive textbook that explores the fundamentals of the criminal justice system. It delves into key topics such as criminology, criminal law, and the justice process, providing a detailed analysis of the system’s structure and functions. The book incorporates real-world examples and updated content to ensure relevance, making it an essential resource for students and professionals alike. Its clear and engaging presentation helps readers grasp complex concepts efficiently.

1.2 Authors and Publication Details

Criminal Justice in Action, 11th Edition, is authored by Larry K. Gaines and Roger LeRoy Miller, renowned experts in the field of criminal justice. Published by Cengage Learning, the book is widely recognized for its comprehensive coverage of the criminal justice system. The digital and eTextbook ISBN is 9798214341033, while the print ISBN is 9780357630785. This edition was published in 2025, ensuring the content is up-to-date and relevant for modern criminal justice studies. The authors’ expertise and the publisher’s reputation make this textbook a trusted resource for students and professionals alike.

1.3 Importance of the 11th Edition

The 11th edition of Criminal Justice in Action is significant for its updated content, reflecting current trends and legal developments. It emphasizes ethics and critical thinking, preparing students for real-world challenges in criminal justice. The inclusion of digital resources and interactive tools enhances learning experiences, making it a valuable resource for both academic and professional use. This edition ensures students are well-equipped with the latest knowledge and skills, aligning with the evolving needs of the criminal justice field. Its relevance and accessibility make it a cornerstone for modern criminal justice education.

Key Features of the 11th Edition

The 11th edition offers updated content, enhanced digital resources, and a strong focus on ethics and critical thinking. It provides a comprehensive understanding of criminal justice.

2.1 Updated Content and Current Events

The 11th edition incorporates the latest developments in criminal justice, including recent legal changes and high-profile cases. It addresses contemporary issues like race, poverty, and technology’s impact on crime. The text also explores emerging trends in law enforcement, such as community policing and the use of digital evidence. By integrating current events, the book provides students with a relevant and engaging learning experience, helping them understand the evolving nature of the criminal justice system.

2.2 Enhanced Digital Resources

The 11th edition offers enhanced digital resources, including MindTap, a platform providing interactive tools, flashcards, and quizzes. Students can access eTextbooks, video cases, and self-assessment exercises. The digital version is compatible with multiple devices, allowing seamless learning on-the-go. Additionally, built-in study tools like highlights and audio narration enhance engagement. These resources facilitate a deeper understanding of criminal justice concepts and support retention through active learning techniques.

2.3 Focus on Ethics and Critical Thinking

The 11th edition emphasizes ethics and critical thinking, encouraging students to analyze real-world dilemmas in criminal justice. Ethical issues in law enforcement, courts, and corrections are explored, fostering a deeper understanding of moral principles. Interactive exercises and case studies promote problem-solving and decision-making skills, preparing students for professional challenges. This focus ensures learners develop a strong ethical foundation and critical thinking abilities essential for careers in criminal justice.

ISBNs and Edition Information

The 11th edition features ISBNs: Digital and eTextbook ISBNs: 9798214341033, Print ISBNs: 9780357630785, 0357630785, and additional ISBNs for bundles: 9780357630846, 9780357630822.

3.1 Digital and eTextbook ISBNs

The Digital and eTextbook ISBNs for Criminal Justice in Action, 11th Edition are 9798214341033. These ISBNs are specifically assigned to the digital versions of the textbook, ensuring easy access to the content via platforms like VitalSource. The eTextbook is compatible with various devices, making it a convenient option for students and professionals. Purchasing the digital version often comes with additional resources, such as interactive study tools and access to the MindTap platform, enhancing the learning experience. The digital format also offers cost savings compared to print editions, with discounts available for eTextbook purchases.

3.2 Print ISBNs

The print ISBNs for Criminal Justice in Action, 11th Edition are 9780357630785 and 0357630785. These ISBNs are assigned to the physical copies of the textbook, making it easy to identify and purchase the book from retailers or online marketplaces. The print version provides a traditional learning experience, with all the content neatly organized in a hardcopy format. Students and professionals can access the same comprehensive coverage of criminal justice topics, including theories, laws, and real-world applications, ensuring a thorough understanding of the subject matter.

3.4 Additional ISBNs for Bundles

Additional ISBNs for bundles of Criminal Justice in Action, 11th Edition include 9780357630846 and 9780357630822. These bundles often combine the textbook with MindTap digital resources, offering enhanced learning tools. For example, the K12 Print & Digital Bundle with 1-year MindTap access is available under ISBN 9780357878309, priced at $192.25, while the 6-year access bundle is priced at $240.50. These options provide flexibility for students seeking comprehensive study materials.

Pricing and Availability

The digital version is priced at $32.50, while the print edition costs $79.99. Discounts up to 80% are available for digital purchases via VitalSource.

4.1 Cost of Print and Digital Versions

The print version of Criminal Justice in Action 11th Edition is priced at $79.99, while the digital version is available for $32.50, offering significant cost savings. The eTextbook can be purchased through platforms like VitalSource, with discounts of up to 80% off the print price. This makes the digital option a cost-effective choice for students and professionals. Prices may vary slightly depending on the retailer or any ongoing promotions. The digital format ensures accessibility across multiple devices, providing flexibility for different learning preferences.

4.2 Discounts for Digital Purchases

Digital purchases of Criminal Justice in Action 11th Edition offer significant savings, with discounts of up to 80% off the print price. The eTextbook is available for $32.50, compared to the print version’s $79.99. Platforms like VitalSource and Cengage Unlimited provide access to the digital version at reduced rates. Additionally, purchasing directly from Cengage may offer further discounts or promotional pricing. These options make the digital format an economical choice for students seeking affordable access to the material without compromising on content quality or functionality.

4.3 Bundle Pricing Options

The 11th Edition offers bundle pricing options that combine the print textbook with digital resources. For instance, the K12 Print & Digital Bundle with MindTap access (1-year) is priced at $192.25, while the 6-year access bundle costs $240.50. These bundles include the print book, eTextbook, and MindTap digital platform. Standalone MindTap access is also available for $192.25 (1-year) or $240.50 (6-year). Bundles provide cost-effective access to both physical and digital materials, ideal for students seeking a comprehensive learning experience with integrated study tools.

Where to Find the PDF Version

The PDF version of Criminal Justice in Action 11th Edition can be found through official retailers like Cengage Learning, VitalSource, or online marketplaces like Amazon or eBay. Additionally, academic libraries and platforms such as Scribd or OpenLibrary may offer access to the digital version.

5.1 Official Retailers and Platforms

The Criminal Justice in Action 11th Edition PDF can be purchased or accessed through official retailers like Cengage Learning and VitalSource. These platforms offer legitimate digital versions of the textbook, ensuring compliance with copyright laws. Additionally, the official Cengage website provides eTextbook options, and VitalSource often features discounts for digital purchases. Students and professionals can also explore the Cengage Unlimited subscription for cost-effective access to this and other educational resources. Always prioritize purchasing from authorized sources to support authors and publishers.

5.2 Online Marketplaces

Online marketplaces like Amazon and eBay often list the Criminal Justice in Action 11th Edition PDF for sale or rent. These platforms may offer competitive pricing and convenience. However, buyers should verify the seller’s legitimacy to ensure they are purchasing a legal copy. Be cautious of pirated versions, as they violate copyright laws and may lack quality or completeness. Always prioritize purchasing from authorized retailers or the publisher’s official website to support the authors and publishers. Legal purchases ensure access to the full, high-quality content of the textbook.

5.3 Academic Resources and Libraries

Academic institutions and libraries often provide access to the Criminal Justice in Action 11th Edition PDF through their databases or e-book collections. Students and researchers can access this resource via platforms like JSTOR, ProQuest, or their university’s library portal. Many libraries offer interlibrary loan services, allowing users to request digital versions of the textbook. Additionally, some academic databases may provide chapters or excerpts for research purposes. Always ensure to use legitimate academic sources to access the material legally and ethically.

Content Structure and Chapters

Criminal Justice in Action 11th Edition is structured to provide a comprehensive understanding, with chapters covering the criminal justice system, criminology, criminal law, and the justice process.

6.1 The Criminal Justice System

The Criminal Justice System chapter in the 11th Edition provides an in-depth exploration of the structure and functions of law enforcement, courts, and corrections. It examines how these components interact to maintain justice and public safety. The text uses real-world scenarios to illustrate key concepts, such as the role of police in society, the trial process, and the challenges faced by correctional institutions. Ethical considerations and contemporary issues are also highlighted, offering students a well-rounded understanding of the system’s complexities and its impact on communities.

6.2 Criminology and Theories of Crime

Criminology and Theories of Crime delves into the causes and explanations of criminal behavior. The chapter explores various theories, including biological, psychological, and sociological perspectives. It examines how factors like environment, social structures, and individual characteristics influence crime. The text also discusses the role of criminological theories in shaping crime prevention strategies and policies. By understanding these theories, students gain insights into the complexities of criminal behavior and how to address it effectively within the criminal justice system. This section is essential for developing a comprehensive understanding of crime and its societal impact.

6.3 Criminal Law and Its Development

Criminal Law and Its Development explores the evolution of legal frameworks that define criminal behavior and prescribe punishments. The chapter traces the historical roots of criminal law, from common law traditions to modern statutory codes. It examines how laws reflect societal values and adapt to changing norms. Key topics include the role of legislatures, courts, and legal precedents in shaping criminal law. This section also discusses the importance of understanding legal principles for professionals in the criminal justice system, emphasizing the balance between justice and individual rights. The content provides a foundational understanding of how criminal law operates in modern society.

6.4 The Criminal Justice Process

The criminal justice process outlines the sequence of events from crime detection to offender rehabilitation. It begins with investigation and arrest by law enforcement, followed by charging and prosecution. The trial phase determines guilt, with sentencing as the outcome. Corrections involve incarceration or probation, aiming for rehabilitation. Victims’ rights and support systems are integral throughout. This structured approach ensures accountability while balancing justice and individual rights, maintaining societal order and promoting community safety through fair legal practices.

Additional Resources and Supplements

MindTap digital platform offers interactive tools, while study guides and test banks provide comprehensive support for students. Instructor resources include companion websites for effective teaching and learning.

7.1 MindTap Digital Learning Platform

MindTap is an innovative digital platform that complements the Criminal Justice in Action 11th Edition textbook. It offers a range of interactive tools, including quizzes, videos, and multimedia content, designed to enhance student engagement and understanding. With MindTap, students can access the eTextbook, complete assignments, and track their progress in a personalized learning environment. Instructors can also customize content, integrate with Learning Management Systems (LMS), and use analytics to monitor student performance. This platform supports both individualized and collaborative learning experiences, making it a valuable resource for criminal justice education.

7.2 Study Guides and Test Banks

Supplemental study guides and test banks accompany the Criminal Justice in Action 11th Edition, providing students with additional resources to master the material. The study guides offer chapter summaries, practice questions, and critical thinking exercises to reinforce learning. Test banks include multiple-choice questions, true/false statements, and essay prompts, enabling instructors to create comprehensive assessments. These tools are designed to enhance understanding and retention of key concepts, supporting both student success and instructor effectiveness in teaching criminal justice principles and practices.

7.3 Instructor Companion Website

The Instructor Companion Website for Criminal Justice in Action 11th Edition offers educators a wealth of resources to enhance their teaching experience. This platform provides access to lecture slides, discussion questions, and activity ideas, along with a test bank and instructor’s manual. Additionally, it includes customizable content and integration options with Learning Management Systems (LMS), allowing professors to create tailored lesson plans. The site serves as a comprehensive support tool, ensuring instructors can effectively deliver course material and engage students throughout the academic term.

Benefits of the Digital Version

The digital version offers accessibility, cost efficiency, and built-in study tools, making it a convenient and affordable option for students and educators alike.

8.1 Accessibility and Compatibility

The digital version of Criminal Justice in Action, 11th Edition is accessible on any device, ensuring flexibility for students and educators. It is compatible with various platforms, including VitalSource, allowing seamless integration into learning management systems. The eTextbook can be read on desktops, tablets, and mobile devices, making it ideal for on-the-go studying. Additionally, features like search functionality, highlighting, and note-taking enhance the learning experience. This accessibility ensures that users can engage with the content anywhere, anytime, without compromising functionality or readability.

8.2 Built-in Study Tools

The digital version of Criminal Justice in Action, 11th Edition includes built-in study tools designed to enhance learning. Features such as highlighting, note-taking, and search functionalities allow students to interact with the content effectively. The MindTap platform offers additional resources, including quizzes, flashcards, and interactive activities, to reinforce key concepts. These tools facilitate active learning and help students prepare for assessments. The integrated study aids ensure a comprehensive and engaging experience, making the digital edition a valuable resource for academic success.

8.3 Cost Efficiency

The digital version of Criminal Justice in Action, 11th Edition offers significant cost savings compared to the print edition. Students can save up to 80% by opting for the eTextbook, making it a budget-friendly option. Platforms like VitalSource provide affordable access to the PDF version, ensuring that learners can acquire the material without financial strain. This cost efficiency makes the digital edition an attractive choice for students seeking a high-quality educational resource at a lower price point, while still benefiting from the same comprehensive content and features.

Reviews and Ratings

Criminal Justice in Action, 11th Edition has received positive reviews, with a 4.3-star rating on platforms like VitalSource and 3.6 stars on Goodreads. Students praise its clarity and real-world applications, while instructors highlight its comprehensive coverage of key topics.

9.1 Student Feedback

Students have praised the 11th Edition for its engaging approach and real-world relevance. Many appreciate the updated content and digital tools, which enhance learning. The clear structure and concise explanations make complex concepts accessible. Some highlight the book’s practical applications, making it a valuable resource for criminal justice studies. Overall, students find it a comprehensive and user-friendly textbook that supports academic success and professional understanding of the criminal justice system.

9.2 Instructor Testimonials

Instructors praise the 11th Edition for its ability to engage students with real-world examples and updated content. The integration of digital tools like MindTap is highlighted as a valuable resource for interactive learning and assessment. Many appreciate the structured approach, which aligns well with course objectives. The customizable nature of the textbook and its compatibility with Learning Management Systems (LMS) are also commended. Overall, instructors find it an effective tool for teaching criminal justice concepts, emphasizing its practicality and alignment with modern educational needs.

9.4 Goodreads and Other Platforms

On Goodreads, Criminal Justice in Action 11th Edition holds a rating of 3.6 out of 5 stars, with readers praising its comprehensive coverage of key concepts. Many users appreciate the book’s ability to connect theoretical ideas with real-world scenarios. Other platforms also reflect positive feedback, with an average rating of 4.3 out of 5 stars. Reviewers highlight the updated content and its relevance to modern criminal justice issues. Some users mention the PDF version’s accessibility as a major advantage, making it a popular choice among students and professionals alike.

Comparison with Previous Editions

The 11th edition offers updated content, enhanced digital resources, and a stronger focus on ethics and critical thinking compared to earlier versions, making it more comprehensive and relevant.

10.1 What’s New in the 11th Edition

The 11th edition of Criminal Justice in Action introduces several enhancements, including updated content on current events and emerging trends in criminal justice. New instructor reports provide insights into student performance, enabling targeted interventions. The integration of MindTap digital resources offers a more interactive learning experience, with built-in study tools like highlighting and audiobook features. Additionally, the edition places a stronger emphasis on ethics and critical thinking, with real-world case studies to illustrate key concepts. These updates ensure the text remains relevant and engaging for modern students.

10.2 Improvements Over the 10th Edition

The 11th edition of Criminal Justice in Action offers significant improvements over its predecessor, including a more streamlined structure and updated chapters. Enhanced digital resources, such as interactive activities and real-time progress tracking, are now seamlessly integrated with the MindTap platform. The content has been expanded to include recent legal developments and contemporary issues in criminal justice. Additionally, the 11th edition features improved accessibility features, ensuring that all learners can engage with the material effectively. These enhancements contribute to a more engaging and comprehensive learning experience.

10.3 Relevance of Updated Content

The updated content in the 11th edition of Criminal Justice in Action ensures relevance by addressing current events and contemporary issues. It incorporates recent legal developments, emerging trends, and real-world applications, making it highly applicable to modern criminal justice practices. The revised material helps students and professionals stay informed about changes in laws, technologies, and societal influences shaping the field. This ensures the text remains a vital resource for understanding the complexities of criminal justice in today’s dynamic environment.

Legal and Ethical Considerations

Purchasing legal copies of Criminal Justice in Action 11th Edition supports authors and publishers, ensuring ethical academic practices. It also avoids legal consequences of using pirated materials.

11.1 Importance of Purchasing Legal Copies

Purchasing legal copies of Criminal Justice in Action 11th Edition ensures compliance with copyright laws and supports authors and publishers. It guarantees access to high-quality, virus-free content while promoting ethical academic practices. Legal copies often include additional resources like MindTap, enhancing the learning experience. By buying legally, you contribute to the sustainability of educational materials and avoid potential legal consequences associated with pirated content. Investing in legitimate sources fosters a fair and supportive environment for both creators and consumers in the academic community.

11.2 Consequences of Using Pirated Material

Using pirated copies of Criminal Justice in Action 11th Edition can lead to legal consequences, including fines and penalties for copyright infringement. Pirated materials often contain viruses or malware, risking device security and personal data. Additionally, using unauthorized copies undermines the efforts of authors and publishers, depriving them of fair compensation. Ethical academic practices are compromised, and users may face disciplinary action from educational institutions. Supporting piracy hinders the creation of quality educational resources, ultimately harming both individuals and the academic community.

11.3 Supporting Authors and Publishers

Purchasing legitimate copies of Criminal Justice in Action 11th Edition ensures authors and publishers receive fair compensation for their work. This support incentivizes the creation of high-quality educational resources and updates. Legal purchases also grant access to official digital platforms, study tools, and customer support from Cengage Learning. By respecting intellectual property, students and professionals contribute to the sustainability of academic publishing and the development of future educational materials. This ethical choice promotes innovation and maintains the integrity of the criminal justice education system.

Criminal Justice in Action 11th Edition is a vital resource for understanding the criminal justice system. Its updated content, ethical focus, and digital tools make it indispensable for students and professionals. By purchasing legal copies, readers support authors and publishers, ensuring continued quality in educational materials. This textbook remains a cornerstone in criminal justice education, providing valuable insights and fostering critical thinking in the field.

12.1 Value of the 11th Edition

The 11th Edition of Criminal Justice in Action offers exceptional value through its comprehensive coverage of the criminal justice system. It provides updated content, including recent legal developments and real-world examples, ensuring relevance for modern students. Enhanced digital resources, such as MindTap, improve engagement and understanding. The focus on ethics and critical thinking prepares learners for professional challenges. This edition is a cost-effective, accessible, and invaluable resource for both academic and professional use in criminal justice education.

12.2 Encouragement to Purchase Legally

Purchasing the 11th Edition legally ensures access to high-quality, authenticated content while supporting the authors and publishers. Legal copies guarantee the latest updates and features, providing a seamless learning experience. By buying through official retailers or platforms, you contribute to ethical publishing practices and receive a valid warranty. Additionally, legal purchases often include access to exclusive digital resources, enhancing the value of your investment. Support education and intellectual property by choosing legal options for your academic needs.

12.3 Final Remarks on Criminal Justice Education

Criminal Justice in Action, 11th Edition, serves as a vital resource for understanding the complexities of the criminal justice system. By investing in quality education, students gain a deeper insight into the ethical, legal, and practical aspects of this field. Legal purchases ensure access to the most current and accurate information, supporting both academic success and professional development. Emphasizing ethical learning practices fosters a strong foundation for future leaders in criminal justice, promoting integrity and knowledge-driven decision-making.

the way of a pilgrim pdf

The Way of a Pilgrim is a timeless spiritual guide recounting a 19th-century Russian pilgrim’s journey‚ emphasizing the transformative power of the Jesus Prayer and prayer without ceasing. This text‚ available as a free PDF‚ offers profound insights into Orthodox spirituality‚ encouraging readers to embrace a life of devotion and inner reflection. Its enduring relevance makes it a cherished resource for modern seekers of spiritual growth and enlightenment.

Overview of the Book

The Way of a Pilgrim is a 19th-century Russian spiritual text that chronicles the journey of an anonymous peasant pilgrim seeking enlightenment through prayer. The book is divided into four narratives‚ detailing the pilgrim’s travels across Russia‚ Ukraine‚ and Siberia‚ as well as his spiritual struggles and growth. It emphasizes the practice of the Jesus Prayer and the concept of “prayer without ceasing‚” offering practical guidance for cultivating inner devotion. The text also includes an appendix with teachings from Orthodox Holy Fathers‚ providing deeper insights into the prayer of the heart. This work remains a cornerstone of Orthodox spirituality‚ inspiring readers to embrace a life of faith and continuous prayer.

Relevance in Modern Spirituality

The Way of a Pilgrim remains a vital text in modern spirituality‚ offering timeless wisdom for those seeking inner peace and spiritual growth. Its emphasis on the Jesus Prayer and “prayer without ceasing” resonates deeply in today’s fast-paced world‚ providing a simple yet profound method for cultivating mindfulness and connection with the divine. The pilgrim’s journey mirrors the universal human quest for meaning‚ transcending cultural and temporal boundaries. Its teachings on humility‚ perseverance‚ and the importance of spiritual guidance continue to inspire contemporary seekers of all backgrounds. As a free PDF‚ it is widely accessible‚ making its insights available to anyone embarking on their own spiritual path in the modern era.

Structure of the Book

The Way of a Pilgrim is organized into four primary narratives‚ detailing the pilgrim’s spiritual and geographical journeys‚ followed by a sequel continuing his wanderings. An appendix provides additional resources‚ including teachings from Holy Fathers and practical guides for interior prayer‚ enriching the reader’s understanding of the pilgrim’s path.

First Narrative

The first narrative introduces the pilgrim’s initial spiritual struggles and his quest for guidance. He encounters a wise staretz (spiritual elder) who teaches him the Jesus Prayer‚ emphasizing its power to bring inner peace. The pilgrim‚ driven by a deep desire to pray without ceasing‚ begins his journey‚ facing various challenges and learning humility. This section sets the foundation for his spiritual growth‚ highlighting the transformative impact of persistent prayer and the pursuit of a deeper connection with God. The narrative establishes the pilgrim’s resolve and the central role of the Jesus Prayer in his life‚ laying the groundwork for his subsequent spiritual adventures and insights.

Second Narrative

The second narrative delves deeper into the pilgrim’s journey as he continues to practice the Jesus Prayer diligently. His travels take him through various regions of Russia and Siberia‚ where he encounters diverse people and experiences both kindness and hardship. Despite challenges‚ his commitment to prayer remains unwavering‚ and he begins to experience moments of profound spiritual clarity. This section highlights his growing humility and reliance on divine guidance‚ as well as his increasing ability to find peace amidst adversity. The narrative also introduces encounters with other spiritual seekers and mentors‚ further enriching his understanding of interior prayer and its transformative power in daily life. His perseverance and devotion serve as a compelling example of the pilgrim’s path to spiritual enlightenment.

Third Narrative

The third narrative explores the pilgrim’s deepening spiritual practice and his encounters with wise spiritual guides who further illuminate the path of interior prayer. He learns to navigate the challenges of constant prayer‚ balancing humility with perseverance. This section highlights his growing understanding of the Jesus Prayer as a means to unite with God‚ even amidst worldly distractions. The pilgrim’s travels continue‚ taking him to remote regions where he faces both physical hardships and spiritual trials. Through these experiences‚ he gains profound insights into the nature of faith‚ forgiveness‚ and the transformative power of prayer. His journey becomes a testament to the enduring strength of devotion and the pursuit of spiritual enlightenment.

Fourth Narrative

The fourth narrative delves into the pilgrim’s continued spiritual ascent‚ marked by profound moments of grace and deeper understanding of the Jesus Prayer. He encounters additional wise mentors who offer guidance on overcoming spiritual complacency and maintaining unwavering devotion. The pilgrim’s travels take him to new regions‚ where he faces fresh challenges‚ yet his resolve strengthens. This section emphasizes the importance of humility‚ perseverance‚ and trust in divine providence. The pilgrim’s experiences illustrate the transformative power of prayer‚ revealing how it becomes a constant source of comfort and strength in the face of life’s adversities. His journey serves as a powerful reminder of the enduring value of spiritual discipline and faith.

The Pilgrim’s Journey

The pilgrim travels through southern and central Ukraine‚ Russia‚ and Siberia‚ practicing the Jesus Prayer continuously‚ seeking spiritual enlightenment and a deeper connection with God.

Geographical Travels

The pilgrim’s journey spans across southern and central Ukraine‚ Russia‚ and Siberia‚ showcasing a diverse array of landscapes and cultural influences. His travels reflect a deep spiritual quest‚ as he moves from bustling cities to serene wilderness areas‚ seeking solitude and divine connection. The geographical diversity of his path symbolizes the broader universal truths he uncovers‚ emphasizing that spiritual growth is not confined to a specific place but is a continuous journey of the heart. Through his wanderings‚ the pilgrim encounters various people who contribute to his understanding of faith and prayer‚ enriching his experience and deepening his resolve to live a life devoted to God.

Spiritual Growth and Challenges

The pilgrim’s journey is marked by profound spiritual growth‚ as he learns to pray without ceasing and embrace the Jesus Prayer as a constant source of strength. Despite facing numerous challenges‚ including physical hardships and moments of doubt‚ he perseveres‚ guided by the wisdom of the Holy Fathers. His unwavering dedication to prayer transforms his inner life‚ fostering humility‚ compassion‚ and a deeper connection to God. The pilgrim’s experiences highlight the transformative power of faith and the importance of perseverance in overcoming spiritual and worldly obstacles‚ ultimately leading to a life of profound devotion and inner peace.

Key Teachings of the Book

The Way of a Pilgrim emphasizes the transformative power of the Jesus Prayer and prayer without ceasing‚ offering practical wisdom for cultivating constant communion with God in daily life.

The Jesus Prayer

The Jesus Prayer‚ central to The Way of a Pilgrim‚ is a simple yet profound invocation: “Lord Jesus Christ‚ have mercy on me.” Repeated continually‚ it seeks to cultivate a constant connection with God. The pilgrim learns this prayer from a wise spiritual guide‚ discovering its power to transform the heart and mind. Through persistent practice‚ the prayer becomes an inseparable part of his being‚ guiding him toward humility‚ love‚ and inner peace. The text emphasizes the prayer’s ability to transcend outward circumstances‚ offering solace in trials and fostering a deep‚ unshakable faith. Its simplicity belies its profound impact‚ making it accessible to all seekers of spiritual truth.

Prayer Without Ceasing

Prayer without ceasing‚ a central theme in The Way of a Pilgrim‚ refers to the practice of maintaining a continuous dialogue with God throughout daily life. The pilgrim learns to integrate this practice into every moment‚ whether walking‚ working‚ or resting. This unbroken prayer becomes a natural rhythm‚ fostering a deep sense of God’s presence and transforming the heart. The text highlights the pilgrim’s struggles and breakthroughs in achieving this state‚ emphasizing the importance of persistence and humility. Through this practice‚ he discovers inner peace and joy‚ illustrating the transformative power of prayer in everyday life. The concept remains a powerful inspiration for modern spiritual seekers striving to live with constant mindfulness of God.

The Role of the Holy Fathers

The Holy Fathers play a pivotal role in guiding the pilgrim on his spiritual journey‚ offering wisdom and practical advice on prayer and inner transformation. Their teachings emphasize the importance of humility‚ perseverance‚ and surrender to God’s will. The pilgrim seeks their counsel‚ learning valuable lessons on how to deepen his prayer life and overcome spiritual challenges. The Holy Fathers’ insights‚ rooted in Orthodox tradition‚ provide the pilgrim with a clear path toward inner peace and unity with God. Their influence is instrumental in shaping his understanding of the Jesus Prayer and prayer without ceasing‚ demonstrating the enduring value of spiritual mentorship in the pursuit of a devout life.

Historical Context

The Way of a Pilgrim emerges from 19th-century Russia‚ reflecting the spiritual resurgence of Orthodox Christianity. It captures the era’s devotion to the Jesus Prayer and mysticism.

19th-Century Russian Spirituality

The 19th century marked a period of profound spiritual awakening in Russia‚ with a resurgence of interest in mystical practices and the teachings of the Orthodox Church. The Way of a Pilgrim reflects this era’s emphasis on inner prayer and the pursuit of divine grace. The text highlights the importance of the Jesus Prayer‚ a central devotional practice‚ and the pilgrim’s relentless quest for spiritual guidance. It also underscores the influence of the Holy Fathers‚ whose wisdom shaped the spiritual landscape of the time. The pilgrim’s journey through southern Ukraine‚ Russia‚ and Siberia symbolizes the broader spiritual movement‚ offering a vivid portrayal of faith and devotion in 19th-century Russia.

The Influence of Orthodox Christianity

Orthodox Christianity deeply shaped the spiritual framework of The Way of a Pilgrim‚ emphasizing the pursuit of inner prayer and the attainment of divine grace. The text reflects the rich traditions of Eastern Orthodoxy‚ particularly the practice of hesychasm‚ which seeks stillness and unity with God. The pilgrim’s reliance on the Jesus Prayer‚ a cornerstone of Orthodox spirituality‚ illustrates the Church’s emphasis on constant devotion. The narrative also highlights the role of monasticism and the wisdom of the Holy Fathers‚ who provided spiritual guidance to seekers. This influence is evident in the pilgrim’s journey‚ as he navigates a path of humility‚ repentance‚ and unwavering faith‚ embodying the Orthodox ideal of theosis‚ or union with God.

The Pilgrim’s Account

The Pilgrim’s Account details the wanderings of a devout seeker‚ sharing encounters with spiritual guides and the practical wisdom gained through relentless prayer and humility.

Meetings and Encounters

The pilgrim’s journey is marked by meaningful encounters with wise spiritual guides who impart valuable teachings on prayer and humility. These meetings‚ often unexpected‚ provide the pilgrim with deeper insights into the Jesus Prayer and its practice. Through these interactions‚ he learns the importance of perseverance‚ inner stillness‚ and the transformative power of constant prayer. Each encounter strengthens his resolve and refines his understanding of the spiritual path. The pilgrim’s humility and openness to guidance allow him to grow spiritually‚ making these meetings pivotal moments in his quest for a deeper connection with God. These experiences are central to his narrative‚ illustrating the role of community and mentorship in spiritual growth.

Lessons Learned from Spiritual Guides

The pilgrim gains profound wisdom from his encounters with spiritual mentors‚ who teach him the essence of the Jesus Prayer and the importance of humility. He learns that true prayer is not merely a recitation but a heartfelt communion with God‚ requiring patience and persistence. The guides emphasize the value of inner stillness and the necessity of overcoming distractions to achieve prayer without ceasing. They also stress the role of scripture and the teachings of the Holy Fathers in deepening spiritual practice. These lessons transform the pilgrim’s understanding of prayer‚ enabling him to embrace a life of constant devotion and inner transformation. Their wisdom becomes the cornerstone of his spiritual journey.

Appendix and Additional Resources

The appendix provides additional insights‚ including Three Keys to the Interior Treasure House of Prayer and teachings from Holy Fathers‚ aiding readers in deepening their spiritual practice.

Three Keys to the Interior Treasure House of Prayer

The appendix reveals three essential keys to unlocking the depths of prayer: attentiveness‚ humility‚ and love. These principles guide the pilgrim in cultivating a pure heart and maintaining ceaseless prayer. Attentiveness involves focusing on God’s presence‚ while humility softens the heart‚ allowing grace to flow. Love‚ as the highest virtue‚ unites the pilgrim with God. These teachings emphasize the importance of inner stillness and the rejection of worldly distractions. By mastering these keys‚ one can attain profound spiritual transformation and experience the joy of unceasing prayer. This section serves as a practical guide‚ helping readers apply the pilgrim’s lessons to their own spiritual journeys‚ fostering a deeper connection with the divine.

The Teachings of the Holy Fathers on Interior Prayer

The Holy Fathers provide timeless wisdom on interior prayer‚ emphasizing its transformative power. They teach that prayer is not merely a mental exercise but a heartfelt communion with God. The Fathers stress the importance of the Jesus Prayer‚ “Lord Jesus Christ‚ have mercy on me‚” as a simple yet profound means to attain prayer without ceasing. They advise humility‚ patience‚ and persistence‚ encouraging the pilgrim to seek stillness of the heart. Their teachings highlight the distinction between prayer of the mind and prayer of the heart‚ advocating for the latter as the ultimate goal; These spiritual guides offer practical wisdom‚ rooted in Scripture and tradition‚ to help the pilgrim navigate the challenges of interior prayer and attain spiritual illumination. Their counsel remains a cornerstone of Orthodox spirituality‚ guiding seekers toward a deeper‚ more authentic prayer life.

Readers’ Guides and Commentaries

Readers’ guides and commentaries on The Way of a Pilgrim offer invaluable insights for deeper understanding. These resources provide context‚ historical background‚ and spiritual interpretations‚ helping readers navigate the pilgrim’s journey. Many guides include reflections on the Jesus Prayer‚ prayer without ceasing‚ and the role of the Holy Fathers. They also address practical applications of the teachings in daily life. Additionally‚ commentaries often explore the psychological and theological dimensions of the pilgrim’s experiences. Online forums and study groups further enrich the reading experience‚ allowing readers to share perspectives and gain new understandings. These tools make the text accessible to both seasoned spiritual seekers and newcomers alike‚ fostering a community of learners on the path of interior prayer.

Personal Reflections and Applications

Readers are inspired to integrate the pilgrim’s teachings into daily life‚ fostering mindfulness and perseverance. The Jesus Prayer becomes a practical tool for connecting with God’s presence in everyday moments‚ encouraging spiritual growth and inner peace.

How to Integrate the Teachings into Daily Life

The teachings of The Way of a Pilgrim encourage readers to embrace the Jesus Prayer as a constant companion. By incorporating this practice into daily routines—whether during work‚ travel‚ or rest—individuals can cultivate a deeper sense of God’s presence. The text suggests starting with manageable goals‚ such as reciting the prayer a set number of times each day. Over time‚ this discipline fosters mindfulness and spiritual awareness‚ transforming ordinary moments into opportunities for communion with the divine. The pilgrim’s example shows that profound spiritual growth is achievable through consistency and devotion‚ making the teachings accessible to all who seek a more meaningful life.

Modern Interpretations of the Pilgrim’s Path

Modern readers often interpret the pilgrim’s journey as a metaphor for personal spiritual transformation in today’s fast-paced world. The emphasis on prayer without ceasing resonates with contemporary mindfulness practices‚ encouraging individuals to seek inner peace amidst life’s chaos. Many find the pilgrim’s relentless pursuit of divine connection inspiring‚ applying its principles to their own spiritual quests. The availability of The Way of a Pilgrim as a free PDF has broadened its reach‚ making it accessible to global audiences. Online communities and discussions further enrich its interpretation‚ allowing modern seekers to connect with the pilgrim’s timeless wisdom in innovative ways‚ bridging tradition and modernity.

Legacy and Impact

The Way of a Pilgrim remains a beloved spiritual text‚ inspiring countless seekers globally with its profound teachings on prayer and inner transformation‚ fostering a lasting legacy.

Popularity in Contemporary Times

The Way of a Pilgrim remains widely read and cherished in modern times‚ resonating with spiritual seekers worldwide. Its timeless wisdom on prayer and inner transformation continues to inspire‚ making it a cornerstone of Christian mysticism. The book’s accessibility as a free PDF has further amplified its reach‚ allowing global audiences to explore its teachings. Its relevance extends beyond religious circles‚ appealing to those seeking mindfulness and existential meaning. The pilgrim’s journey mirrors universal human quests for connection and purpose‚ ensuring its enduring appeal in an increasingly complex world. This text bridges centuries‚ offering solace and guidance to contemporary readers embracing spiritual growth.

Translations and Editions

The Way of a Pilgrim has been translated into numerous languages‚ ensuring its global reach and accessibility. The English translation‚ particularly the version by Olga Savin‚ is widely acclaimed for its fidelity to the original Russian text. Various editions are available‚ including annotated versions and study guides‚ which enhance readers’ understanding of the pilgrim’s spiritual journey. The text is also accessible as a free PDF‚ making it easily obtainable for spiritual seekers worldwide. These translations and editions have played a crucial role in preserving the book’s legacy‚ allowing it to inspire new generations. Its widespread availability underscores its enduring relevance in contemporary spirituality.

The Way of a Pilgrim remains a powerful guide for spiritual seekers‚ offering timeless wisdom on prayer and devotion. Its availability as a free PDF ensures accessibility for modern readers‚ making it a cherished resource for those exploring Orthodox spirituality and the transformative power of the Jesus Prayer.

Final Thoughts on the Pilgrim’s Way

The pilgrim’s journey‚ as recounted in The Way of a Pilgrim‚ offers a profound exploration of spiritual growth and devotion. By embracing the Jesus Prayer‚ the pilgrim demonstrates the transformative power of unceasing prayer‚ highlighting its ability to deepen one’s connection with God. The narrative balances geographical travels with inner spiritual struggles‚ providing a holistic view of the pilgrim’s path. Rooted in Orthodox Christianity‚ the text emphasizes the guidance of Holy Fathers and the importance of perseverance in faith. Its historical context‚ set against 19th-century Russia‚ adds depth to the universality of its teachings. Today‚ the pilgrim’s way remains a timeless inspiration‚ encouraging readers to reflect on their own spiritual journeys and strive for a life of prayer and humility.

Encouragement for Readers to Embark on Their Own Spiritual Journey

The Way of a Pilgrim invites readers to embrace their own spiritual path‚ inspired by the pilgrim’s unwavering dedication to prayer and faith. The text encourages seekers to explore the transformative power of the Jesus Prayer and to persevere in their spiritual endeavors‚ even amidst challenges. By sharing the pilgrim’s experiences‚ the book reminds us that spiritual growth is a lifelong journey‚ not a destination. Readers are inspired to integrate prayer into daily life‚ fostering a deeper connection with God. The pilgrim’s humility‚ resilience‚ and devotion serve as a timeless reminder that every step‚ no matter how small‚ brings us closer to divine grace and inner peace.

Resources for Further Study

The Way of a Pilgrim is widely available as a free PDF‚ with various translations and editions offering deeper insights into its teachings. Online communities and forums provide spaces for discussion and reflection‚ enriching the reader’s understanding of the text and its spiritual significance.

Recommended Reading

For deeper exploration‚ readers can complement The Way of a Pilgrim with classic spiritual texts like The Philokalia‚ which explores Eastern Orthodox teachings on prayer and inner transformation. The Interior Castle by St. Teresa of Ávila offers insights into mystical spirituality‚ while modern works like The Power of a Praying Heart provide practical guidance on integrating prayer into daily life. Additionally‚ works by contemporary authors on the Jesus Prayer‚ such as The Art of Prayer by Igumen Chariton‚ enrich understanding of the pilgrim’s spiritual practices. These resources‚ available in various formats‚ offer a holistic approach to deepening one’s spiritual journey.

Online Communities and Discussions

Online forums and social media groups dedicated to Orthodox spirituality offer vibrant discussions on The Way of a Pilgrim. Platforms like Reddit’s r/OrthodoxChristianity and Facebook groups focused on the Jesus Prayer provide spaces for sharing insights and personal reflections. Additionally‚ podcasts and YouTube channels explore the pilgrim’s teachings‚ offering modern interpretations and practical applications. Google searches for “The Way of a Pilgrim PDF” often lead to forums where users share download links and study guides. These digital communities foster connection among spiritual seekers‚ enabling collaborative learning and mutual encouragement as they navigate their own pilgrim’s path.

user manual for ti 89 titanium

The TI-89 Titanium is a powerful graphing calculator designed for advanced math and science. It features a high-resolution display, computer algebra system (CAS), and extensive programming capabilities, making it a favorite among students and professionals for complex computations and graphing needs.

1.1 Overview of the TI-89 Titanium

The TI-89 Titanium is a high-end graphing calculator designed for advanced mathematical computations. It is widely used by students and professionals due to its powerful capabilities and comprehensive tools. The calculator features a color display, a QWERTY keyboard, and a robust programming environment, making it ideal for complex calculations and graphing. Its design focuses on usability, with intuitive navigation and a durable construction. The TI-89 Titanium supports various academic levels, from high school to university, and is approved for use in standardized tests like the SAT and ACT. It also offers advanced features such as a built-in computer algebra system (CAS) for solving equations and a large storage capacity for user-defined programs and data. This calculator is known for its versatility, allowing users to customize their experience through programming and external connectivity. Its popularity stems from its ability to simplify complex mathematical tasks, making it an essential tool for STEM fields. The TI-89 Titanium continues to be a favorite among educators and students alike.

1.2 History and Evolution of the TI-89 Series

The TI-89 Titanium is part of a lineage of advanced graphing calculators developed by Texas Instruments. The original TI-89 was introduced in 1998, marking a significant leap in calculator technology with its computer algebra system (CAS) and high-resolution display. Over the years, the series evolved to meet the growing demands of students and professionals. The TI-89 Titanium, released in 2004, became the successor, offering enhanced features such as increased memory, a faster processor, and improved graphing capabilities. This model was designed to address the needs of advanced mathematics, engineering, and science. The TI-89 series has been widely adopted in educational institutions and is often recommended for its ability to handle complex computations and graphing. Its longevity in the market underscores its reliability and adaptability to changing academic and professional requirements. The TI-89 Titanium remains a staple in many fields, celebrated for its durability and comprehensive functionality.

1.3 Key Features of the TI-89 Titanium

The TI-89 Titanium boasts an array of advanced features that make it a powerful tool for mathematics and science. Its computer algebra system (CAS) enables symbolic manipulation, allowing users to solve equations and simplify expressions precisely. The calculator also features a high-resolution display for detailed graphing, including 2D and 3D graphs, parametric plots, and polar coordinates. Additionally, it supports programming in TI-BASIC and Assembly languages, enabling users to create custom applications. The Titanium version offers increased memory and a faster processor compared to its predecessors, enhancing performance. It also includes built-in functions for statistics, probability distributions, and data analysis, making it versatile for various academic disciplines. The calculator’s durability is further enhanced by its metallic casing, ensuring long-term reliability. These features collectively make the TI-89 Titanium an indispensable resource for students, educators, and professionals tackling complex mathematical and scientific challenges.

Basic Operations

Basic operations on the TI-89 Titanium include turning it on/off, performing arithmetic, and navigating the interface. Use arrow keys to move through menus and select functions. Press [ON] to power on and [OFF] to shut down.

2.1 Turning the Calculator On/Off

To turn the TI-89 Titanium on, locate the power button, which is typically found on the top-right side of the calculator. Press and hold this button until the calculator powers up and displays the startup screen. Ensure the calculator is properly charged or has fresh batteries for optimal performance. To turn the calculator off, press and hold the same power button until the screen goes dark. Note that the calculator may also enter a low-power mode if left inactive for an extended period, helping to conserve battery life. Always power off the device when not in use to prolong battery longevity.

  1. Locate the power button on the top-right side.
  2. Press and hold to turn the calculator on or off.
  3. Wait for the screen to confirm the action.

2.2 Basic Arithmetic Operations

Performing basic arithmetic operations on the TI-89 Titanium is straightforward. Start by entering numbers using the numeric keypad on the right side of the calculator. For addition, press the + button, located on the left side, between two numbers and press ENTER. Subtraction and multiplication follow the same pattern using the ⸺ and × buttons, respectively. Division is performed using the ÷ button. For example, to calculate 5 + 3, press 5, +, 3, and then ENTER. The calculator displays the result, 8, on the screen. For negative numbers, press the (- button before entering the number. Decimal points are entered using the . key. Always press ENTER to execute the operation. The calculator follows the order of operations (PEMDAS), so use parentheses ( and ) to prioritize calculations if needed. To clear the screen or correct an entry, use the DEL or CLEAR buttons.

2.3 Navigating the Calculator Interface

Navigating the TI-89 Titanium interface is intuitive once you familiarize yourself with its layout; The calculator features a full QWERTY keyboard on the left for entering text and commands, while the numeric keypad on the right is used for numbers and basic operations. Use the arrow keys (↑, ↓, ←, →) to move the cursor within equations, menus, and graphs. The ON button serves as the power button and can also be used to clear the screen or reset calculations. Press the F1 or F2 buttons to access context-sensitive menus, which provide shortcuts for common functions. To switch between different modes, such as function definition or graph mode, use the MODE button. For entering variables or labels, press the 2ND key to activate the ALPHA mode, allowing you to input letters and symbols. The calculator’s interface is designed to streamline workflows, making it easier to focus on problem-solving rather than navigation.

Advanced Functions

The TI-89 Titanium offers advanced functions like 3D graphing, symbolic manipulation, and built-in programming. These tools enable users to solve complex equations, visualize multi-variable relationships, and automate repetitive calculations, enhancing productivity for advanced math and engineering tasks.

3.1 Using the Computer Algebra System (CAS)

The TI-89 Titanium’s Computer Algebra System (CAS) is a powerful tool for manipulating mathematical expressions symbolically. It allows users to solve equations, simplify expressions, and perform calculus operations exactly. With CAS, you can find exact solutions to algebraic equations, compute derivatives, and integrate functions, making it invaluable for advanced math problems; To use CAS, navigate to the algebra menu by pressing the appropriate button, then select the desired operation. For example, to solve an equation, enter it into the CAS interface, choose the variable to solve for, and execute the command. The CAS also supports advanced features like solving systems of equations and working with matrices. This capability makes the TI-89 Titanium a robust tool for students and professionals tackling complex mathematical tasks. Always refer to the manual for detailed instructions on maximizing CAS functionality for specific calculations.

3.2 Graphing Capabilities

The TI-89 Titanium excels in graphing functions, equations, and inequalities with its high-resolution display. Users can graph multiple functions simultaneously, analyze their behavior, and explore mathematical relationships visually. To graph a function, enter it into the calculator using the equation editor, then navigate to the graphing menu. The calculator supports both 2D and 3D graphing, allowing for detailed visualizations of complex mathematical concepts. Additionally, the TI-89 Titanium enables users to adjust graphing settings, such as the viewing window, axis labels, and grid lines, to customize the display. Advanced features include the ability to trace curves, find intersections, and analyze derivatives and integrals graphically. This makes it an indispensable tool for understanding and exploring calculus, algebra, and other advanced math topics. By utilizing its graphing capabilities, users can gain deeper insights into mathematical problems and solutions. Always refer to the manual for step-by-step instructions on maximizing its graphing potential.

3.3 Solving Equations and Inequalities

The TI-89 Titanium simplifies solving equations and inequalities with its advanced Computer Algebra System (CAS). Users can input equations using the algebra editor and solve them by selecting the appropriate command from the CAS menu. For example, to solve an equation, press `F2` to access the algebra menu, then choose the `1: solve(` option. Enter the equation, specify the variable, and press `Enter`. The calculator will provide exact solutions, making it ideal for algebraic manipulations. For systems of equations, the TI-89 can handle multiple variables and display solutions in a clear format. Inequalities can also be solved similarly, with the calculator graphing the solution set if needed. This feature is particularly useful for analyzing quadratic, polynomial, and rational expressions. By leveraging the CAS, users can efficiently tackle complex mathematical problems and verify their solutions with precision. Always refer to the manual for detailed instructions on utilizing these advanced solving capabilities.

Programming on the TI-89

Programming on the TI-89 allows users to create custom applications and simplify complex calculations. It supports both basic and advanced programming, enabling the automation of tasks and the creation of interactive tools for problem-solving.

Programming on the TI-89 Titanium allows users to create custom applications, automate tasks, and solve complex problems. This feature is particularly useful for students and professionals seeking to extend the calculator’s functionality. The TI-89 supports a variety of programming languages, including TI-BASIC and Assembly, making it versatile for both beginners and advanced users. To start programming, users can access the programming environment through the calculator’s menu system. The process involves writing and editing code, which can then be executed to perform specific tasks. For example, a simple program might calculate the factorial of a number or solve a quadratic equation. Programming on the TI-89 also enables the creation of interactive tools, such as quizzes or games, adding a creative dimension to problem-solving. With practice, users can unlock the full potential of the TI-89 by developing sophisticated programs tailored to their needs. This feature is a cornerstone of the calculator’s appeal for advanced users.

4.2 Writing Simple Programs

Writing simple programs on the TI-89 Titanium is an excellent way to automate repetitive tasks and enhance productivity. To begin, users can access the programming editor by navigating to the PRGM menu. From there, they can create a new program by selecting New and entering a name for their program. The editor provides a user-friendly interface where commands can be inputted using the calculator’s keyboard or through the menu-driven system. For instance, a basic program might include commands to input a number, perform a calculation, and display the result. The Prgm button is used to execute the program, allowing users to test and refine their code. Variables can be utilized to store and manipulate data, and conditional statements can add logic to the program. Debugging is straightforward, with the calculator providing clear error messages. By starting with simple programs, users can build a strong foundation in TI-89 programming, paving the way for more complex applications. This hands-on approach makes learning to program both accessible and engaging.

4.3 Advanced Programming Concepts

Beyond basic programming, the TI-89 Titanium supports advanced concepts that enhance functionality and efficiency. Users can implement loops (For, While, Repeat) to iterate through processes, reducing redundant code. Conditional statements (If, Else, Case) enable decision-making within programs, allowing for dynamic behavior based on input or calculations. Additionally, the calculator’s programming language allows for the creation of custom functions, which can be reused across multiple programs. Advanced users can also leverage the calculator’s Computer Algebra System (CAS) within their programs to perform symbolic mathematics and solve complex equations programmatically. Furthermore, programs can interact with the calculator’s graphing capabilities, enabling dynamic visualizations. Input and output commands, such as Input and Disp, facilitate user interaction, while subprograms and asynchronous programming offer advanced control over program flow. These features make the TI-89 Titanium a powerful tool for creating sophisticated applications tailored to specific mathematical and scientific needs. Mastery of these concepts unlocks the full potential of the calculator’s programming environment.

Statistics and Probability

The TI-89 Titanium offers robust tools for statistical analysis and probability calculations. It supports functions like mean, median, and standard deviation, as well as probability distributions such as normal and binomial. Users can also perform hypothesis testing and data analysis, making it ideal for advanced statistical computations.

5.1 Statistical Functions

The TI-89 Titanium offers a wide range of statistical functions to help users analyze and interpret data. These functions allow for efficient computation of descriptive statistics, such as mean, median, mode, standard deviation, and variance. Additionally, the calculator supports advanced statistical operations, including regression analysis, hypothesis testing, and probability distribution calculations. Users can input data directly or import it from external sources, making it ideal for classroom and professional use. The calculator also provides tools for visualizing data through histograms and scatter plots, aiding in understanding trends and patterns. These features make the TI-89 Titanium a powerful tool for statistics, enabling users to perform complex calculations with ease and accuracy. Whether it’s for academic assignments or real-world applications, the statistical capabilities of the TI-89 Titanium are robust and reliable. The calculator’s user-friendly interface ensures that even novice users can navigate its statistical functions effortlessly.

5.2 Probability Distributions

The TI-89 Titanium provides comprehensive tools for working with probability distributions, essential for statistical analysis. Users can calculate probabilities, cumulative probabilities, and other distribution properties for common distributions such as Normal, Binomial, Poisson, and Chi-Square. The calculator also supports inverse operations, allowing users to find critical values or probabilities associated with specific distribution parameters. These features are particularly useful for hypothesis testing, confidence intervals, and analyzing random variables. The TI-89 Titanium’s Computer Algebra System (CAS) enables precise symbolic calculations, making it ideal for advanced probability problems. Additionally, the calculator’s graphing capabilities allow users to visualize probability density functions (PDFs) and cumulative distribution functions (CDFs), aiding in understanding distribution shapes and properties. This combination of computational and graphical tools makes the TI-89 Titanium an invaluable resource for students and professionals working with probability and statistics. Its intuitive interface ensures that even complex distribution analyses can be performed efficiently and accurately.

5.3 Data Analysis

The TI-89 Titanium offers robust data analysis tools, enabling users to work seamlessly with datasets for statistical and mathematical applications. The calculator supports data entry, editing, and storage, allowing users to input and manage large datasets efficiently. It provides built-in functions for descriptive statistics, including mean, median, mode, standard deviation, and variance, which are essential for understanding data distributions. Advanced data analysis features include hypothesis testing, regression analysis, and correlation calculations, making it a powerful tool for inferential statistics. Users can also generate various graphs, such as scatter plots, histograms, and box plots, to visualize data trends and patterns. The TI-89 Titanium’s Computer Algebra System (CAS) further enhances data analysis by enabling symbolic computations and solving complex statistical problems. These features make the calculator an indispensable resource for students and professionals conducting data-driven research or analysis. Its capabilities ensure precise and efficient handling of data, from basic calculations to advanced statistical modeling.

Connectivity and Data Transfer

The TI-89 Titanium supports connectivity through USB and serial cables for linking to computers. It also allows data transfer between calculators using cables or infrared ports, enabling easy sharing of files and programs.

6.1 Linking to a Computer

Linking your TI-89 Titanium to a computer allows for seamless data transfer, software updates, and backups. Use the TI Connectivity Cable or a USB-to-TI-Link Adapter for a stable connection. Ensure the TI Connect software is installed on your computer. On the calculator, navigate to the “Link” menu using the arrow keys and press Enter. Select the appropriate link type (e.g., “TI GCM” or “Direct Cable”). On your computer, launch TI Connect and follow prompts to establish the connection. This setup enables file transfers, such as programs, documents, and data, between the calculator and computer. Always ensure both devices are properly synchronized to avoid data loss. For troubleshooting, refer to the TI Connect user guide or Texas Instruments support resources. This feature is essential for managing content efficiently and keeping your calculator updated with the latest functionality. Regular backups are recommended to safeguard important work and configurations.

6.2 Transferring Data Between Calculators

Transferring data between TI-89 Titanium calculators is a straightforward process using the TI Graph Link cable. Connect the cable to both calculators, ensuring they are powered on. On each calculator, navigate to the “Link” menu by pressing the arrow keys and selecting “Link” from the dropdown. Choose “Send” on the calculator with the data and “Receive” on the other. Select the file type (e.g., program, list, or matrix) and confirm the transfer. Data transfer is bidirectional, allowing sharing of programs, notes, and calculations. Ensure both calculators are set to the same link protocol to avoid errors. This feature is useful for collaboration, backups, or transferring files between devices; Always verify the integrity of transferred data to ensure accuracy. Regular transfers can help manage storage and facilitate teamwork. This capability enhances the calculator’s utility in educational and professional settings.

Troubleshooting and Maintenance

Troubleshooting and maintaining the TI-89 Titanium ensures optimal performance. Common issues include low battery, which requires replacing or recharging. If the calculator freezes, press and hold the second button from the top left and the button below it to reset. For display problems, adjust the contrast by pressing the “2nd” key and using the up or down arrows. Clean the screen with a soft cloth to avoid scratches. Regularly back up data to a computer to prevent loss. Update the operating system (OS) to the latest version for improved functionality. Use the TI-Graph Link software to install updates. Avoid exposing the calculator to extreme temperatures or moisture. Replace the lithium battery every 3-5 years or when low battery warnings persist. Store the calculator in a protective case when not in use. These practices extend the lifespan and ensure reliability of the calculator. Proper maintenance enhances user experience and preserves functionality. Regular checks prevent unexpected issues during critical tasks. This ensures the calculator remains a dependable tool for all mathematical needs.